Tutorials · 6 min read
Build your Flutter live streaming application with api.video

Build your Flutter live streaming application with api.video

Learn to Build a Live Streaming App with Flutter: A Competitor to React Native - Tutorial on creating a live streaming app with Flutter in Dart.

Thibault Beyou

March 30, 2023

A few months ago, my colleague Yohann wrote a fantastic article on How to create a React Native live streaming application for mobile targets. This time, you will learn how to create the same application with a React Native competitor: Flutter.

In this article, you will develop a live streaming application in Dart. For further details, check out our official Flutter live stream repository.

Few words about Flutter

Google developed Flutter in 2015. In 2021, it was the most used cross-platform mobile framework (42% against 38% for React Native, source). It is used to develop cross-platform applications (including iOS and Android) quickly. The main difference between Flutter and React Native is that Flutter compiles Dart code to native bytecode/libraries, whereas React Native uses an engine to interpret JavaScript or TypeScript code. If you haven't heard of Flutter, you can learn more on the Flutter website.

Getting started

First, follow the development setup steps from Flutter's official documentation.

If you're new to Flutter, you may also need to learn the basics.

Quick reminder: iOS development is only enabled for macOS users. If you're on Windows or Linux, you can develop for Android.

Create a new Flutter app

  1. Open Android Studio.
  2. You should see a “New Flutter Project” button. Click on it.
  3. Verify the Flutter SDK path and click on “Next.”
  4. Enter your project name: “live_stream_app” (according to the pubspec documentation, the name must be lower_case_with_underscore.)
  5. Make sure the project type is set to Application.
  6. Click on “Finish.”

Launch the application

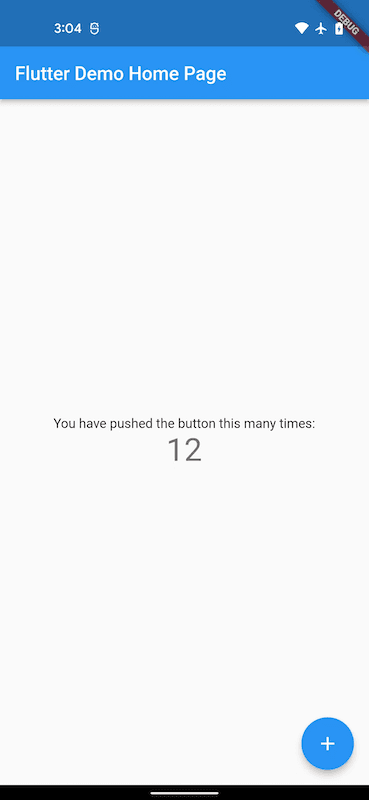
Once Android Studio is launched, you can directly run your application with the control toolbar:

run your application with the control toolbar
  1. Select your phone.
  2. Click on the Run ▶️ icon.

It will take several minutes to finish, stay calm and grab a coffee ☕️

When the application build completes, it will be launched on your phone. Check your phone 🤳🏾

check your phone

🎉🎉🎉Congratulations, you have created your first Flutter application 🎉🎉🎉


Signs your iOS application (optional)

If you have trouble building the application for an iOS device, it might be because the application is not associated with a development profile.

Open Xcode, click "Open a project or file," and open the Runner.xcworkspace located in live_stream_app/ios.

Click on Runner, go to the Signing & Capabilities tab, add your team, and create a unique bundle identifier.

Add the live streaming client to your app

Now let's install the Flutter live streaming client!

Installation

Open a terminal in your live_stream_app folder and the following command:

bash

Also, you need to set the Android minSdkVersion to the one supported by Flutter live stream client.

Open your application build.gradle. It's located in the live_stream_app/android/app directory and replace:

groovy

to:

groovy

The Flutter default project Kotlin version and the apivideo_live_stream Kotlin version might not be in sync. In this case, when building the application, you face errors like was compiled with an incompatible version of Kotlin. The binary version of its metadata is 1.9.0, expected version is 1.7.1..

To fix this, open android/settings.gradle and set the org.jetbrains.kotlin.android in the plugins section to the appropriate version (1.9.0 in the previous error log).

groovy

Permissions

⚠️ Both iOS and Android need permission to broadcast from your device's camera and record audio.

You will also need to ask for internet permission for Android.

Android

From your project folder, open the AndroidManifest.xml file. It’s located in the live_stream_app/android/app/src/main directory. Add the following content just under the opening <manifest> tag to enable internet, audio recording, and the camera for your application:

xml

iOS

From your project folder, open the Info.plist file. It's located in the live_stream_app/ios/Runner directory. Add the following content just under the opening <dict> tag to enable the camera and microphone:

xml

Don't forget to add the app description, as shown above, if you want to deploy your application in app stores.

Usage

You can check the Flutter live streaming sample application for the whole application picture.

Create a controller and the camera preview

Change your main.dart file located in the live_stream_app/lib with the following code:

dart

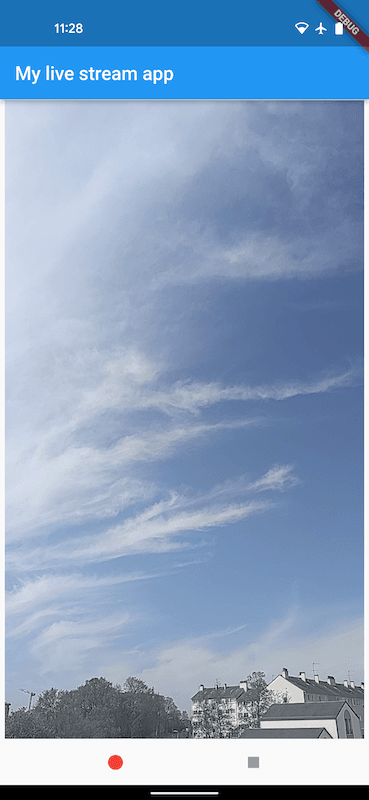
Launch your application. You now have the camera preview.

Manage application lifecycle

The next step is to manage application lifecycle. You will have to stop/start the camera when your application goes to/from the background.

The class _MyHomePageState must implement the abstract class WidgetsBindingObserver. Replace its declaration with:

dart

Register the lifecycle observer, add in initState:

dart

Manage lifecycle:

dart

Add a control panel

You still can't start a live stream because there is no way to do it.

We are going to add a Row of IconButton that can control your live streaming.

Import the following package:

dart

Then, add the following code in _MyHomePageState:

dart

Then, add the _controlRowWidget() in the Colum under the ApiVideoCameraPreview. Replace your _MyHomePageState build method by:

dart

Finally, update the _isStreaming variable in the controller’s callbacks to update the IconButton state when the live streaming is stopped.

Replace createLiveStreamController by:

dart

Run ▶️ your application again.

Run your application again

Launch your first live stream

⚠️⚠️⚠️ If you want to run your live stream, you will need to change YOUR_STREAM_KEY to a real one.

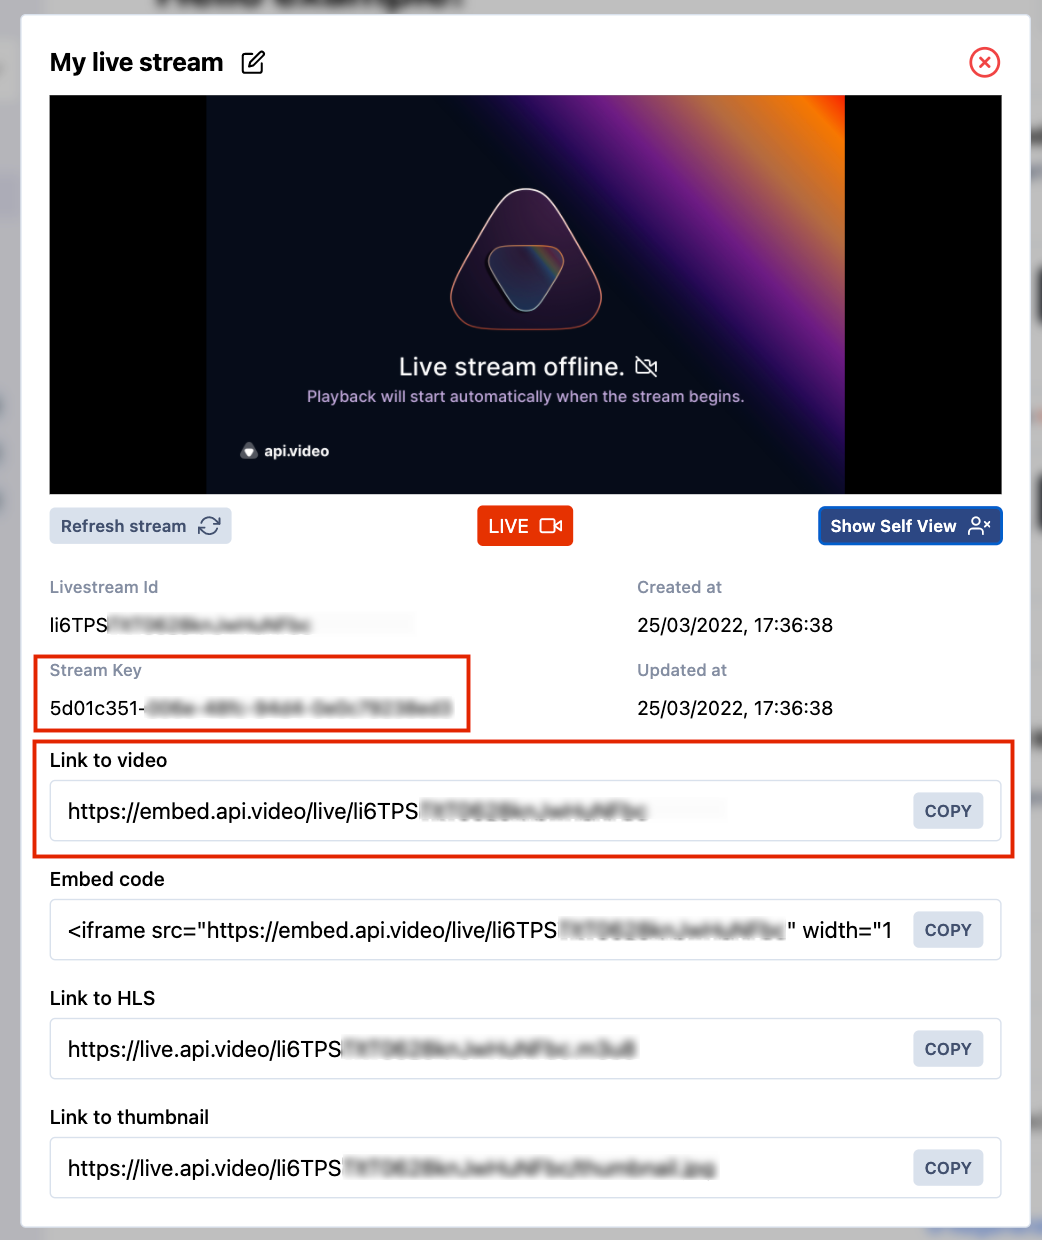
You can find yours in the api.video dashboard. If you don't have an account yet, create one, it's free. Then, create a livestream from the overview or the “Live streams” page.

Find this action card and click on "Start live stream"

A modal will appear with several pieces of information in it, including the shareable link and stream key. Save the shareable link to access your live stream later.

This modal should appear once you click on "Start live stream"

💡 You can also use the api.video API to create a live stream and retrieve your stream key dynamically. Find how to do this right here. Paste your stream key in place of YOUR_STREAM_KEY. Paste your stream key in place of YOUR_STREAM_KEY.

 
Click on the live button in your application; it should be disabled if the live streaming properly starts. Then, go to the shareable link you just saved.

There you go! You can see what your mobile is streaming in real-time! If not, wait a few seconds and check your stream key value.

🎉🎉🎉 Congratulations, you have created your first live streaming Flutter application 🎉🎉🎉

You can now do an actual live stream directly from your Android and iOS devices.

And now what?

api.video provides two development environments. The sandbox allows you to live stream directly from your computer or mobile, but a watermark will be applied to your video, and there is a 30-minute limit for live streams.


To avoid these limitations, sign up to api.video and go into production mode 🚀.

Also, the Flutter RTMP live stream client allows us to do much more in terms of configuration!

You can match both audio and video configuration to your needs.

Also, there are some properties can be updated during the live stream:

  • Camera: front or back
  • Audio: muted or unmuted.

Check out the README for exhaustive information about the apivideo_live_stream package.

Try out more than 80 features for free

Access all the features for as long as you need.
No commitment or credit card required

Video API, simplified

Fully customizable API to manage everything video. From encoding to delivery, in minutes.

Built for Speed

The fastest video encoding platform. Serve your users globally with 140+ points of presence. 

Let end-users upload videos

Finally, an API that allows your end-users to upload videos and start live streams in a few clicks.

Affordable

Volume discounts and usage-based pricing to ensure you don’t exceed your budget.