Tutorials · 7 min read

Boost your live streams with user engagement

Learn how to incorporate realtime data into your livestream while keeping the users engaged.

Artem Matinian

May 31, 2023
How do you make sure that your live stream viewer stays engaged? what are the tools that you can leverage in order to make the most out of the experience? and how can you analyze the viewer's reaction?

In this article, you can learn about the way you can integrate real-time communication into your live stream in order to make an engaging user experience with your live streams.

Although we will only learn how to share emojis between viewers in your live stream, you will be able to leverage the example in order to build robust analytics that will provide you great insight into when and how the viewers reacted to the stream.

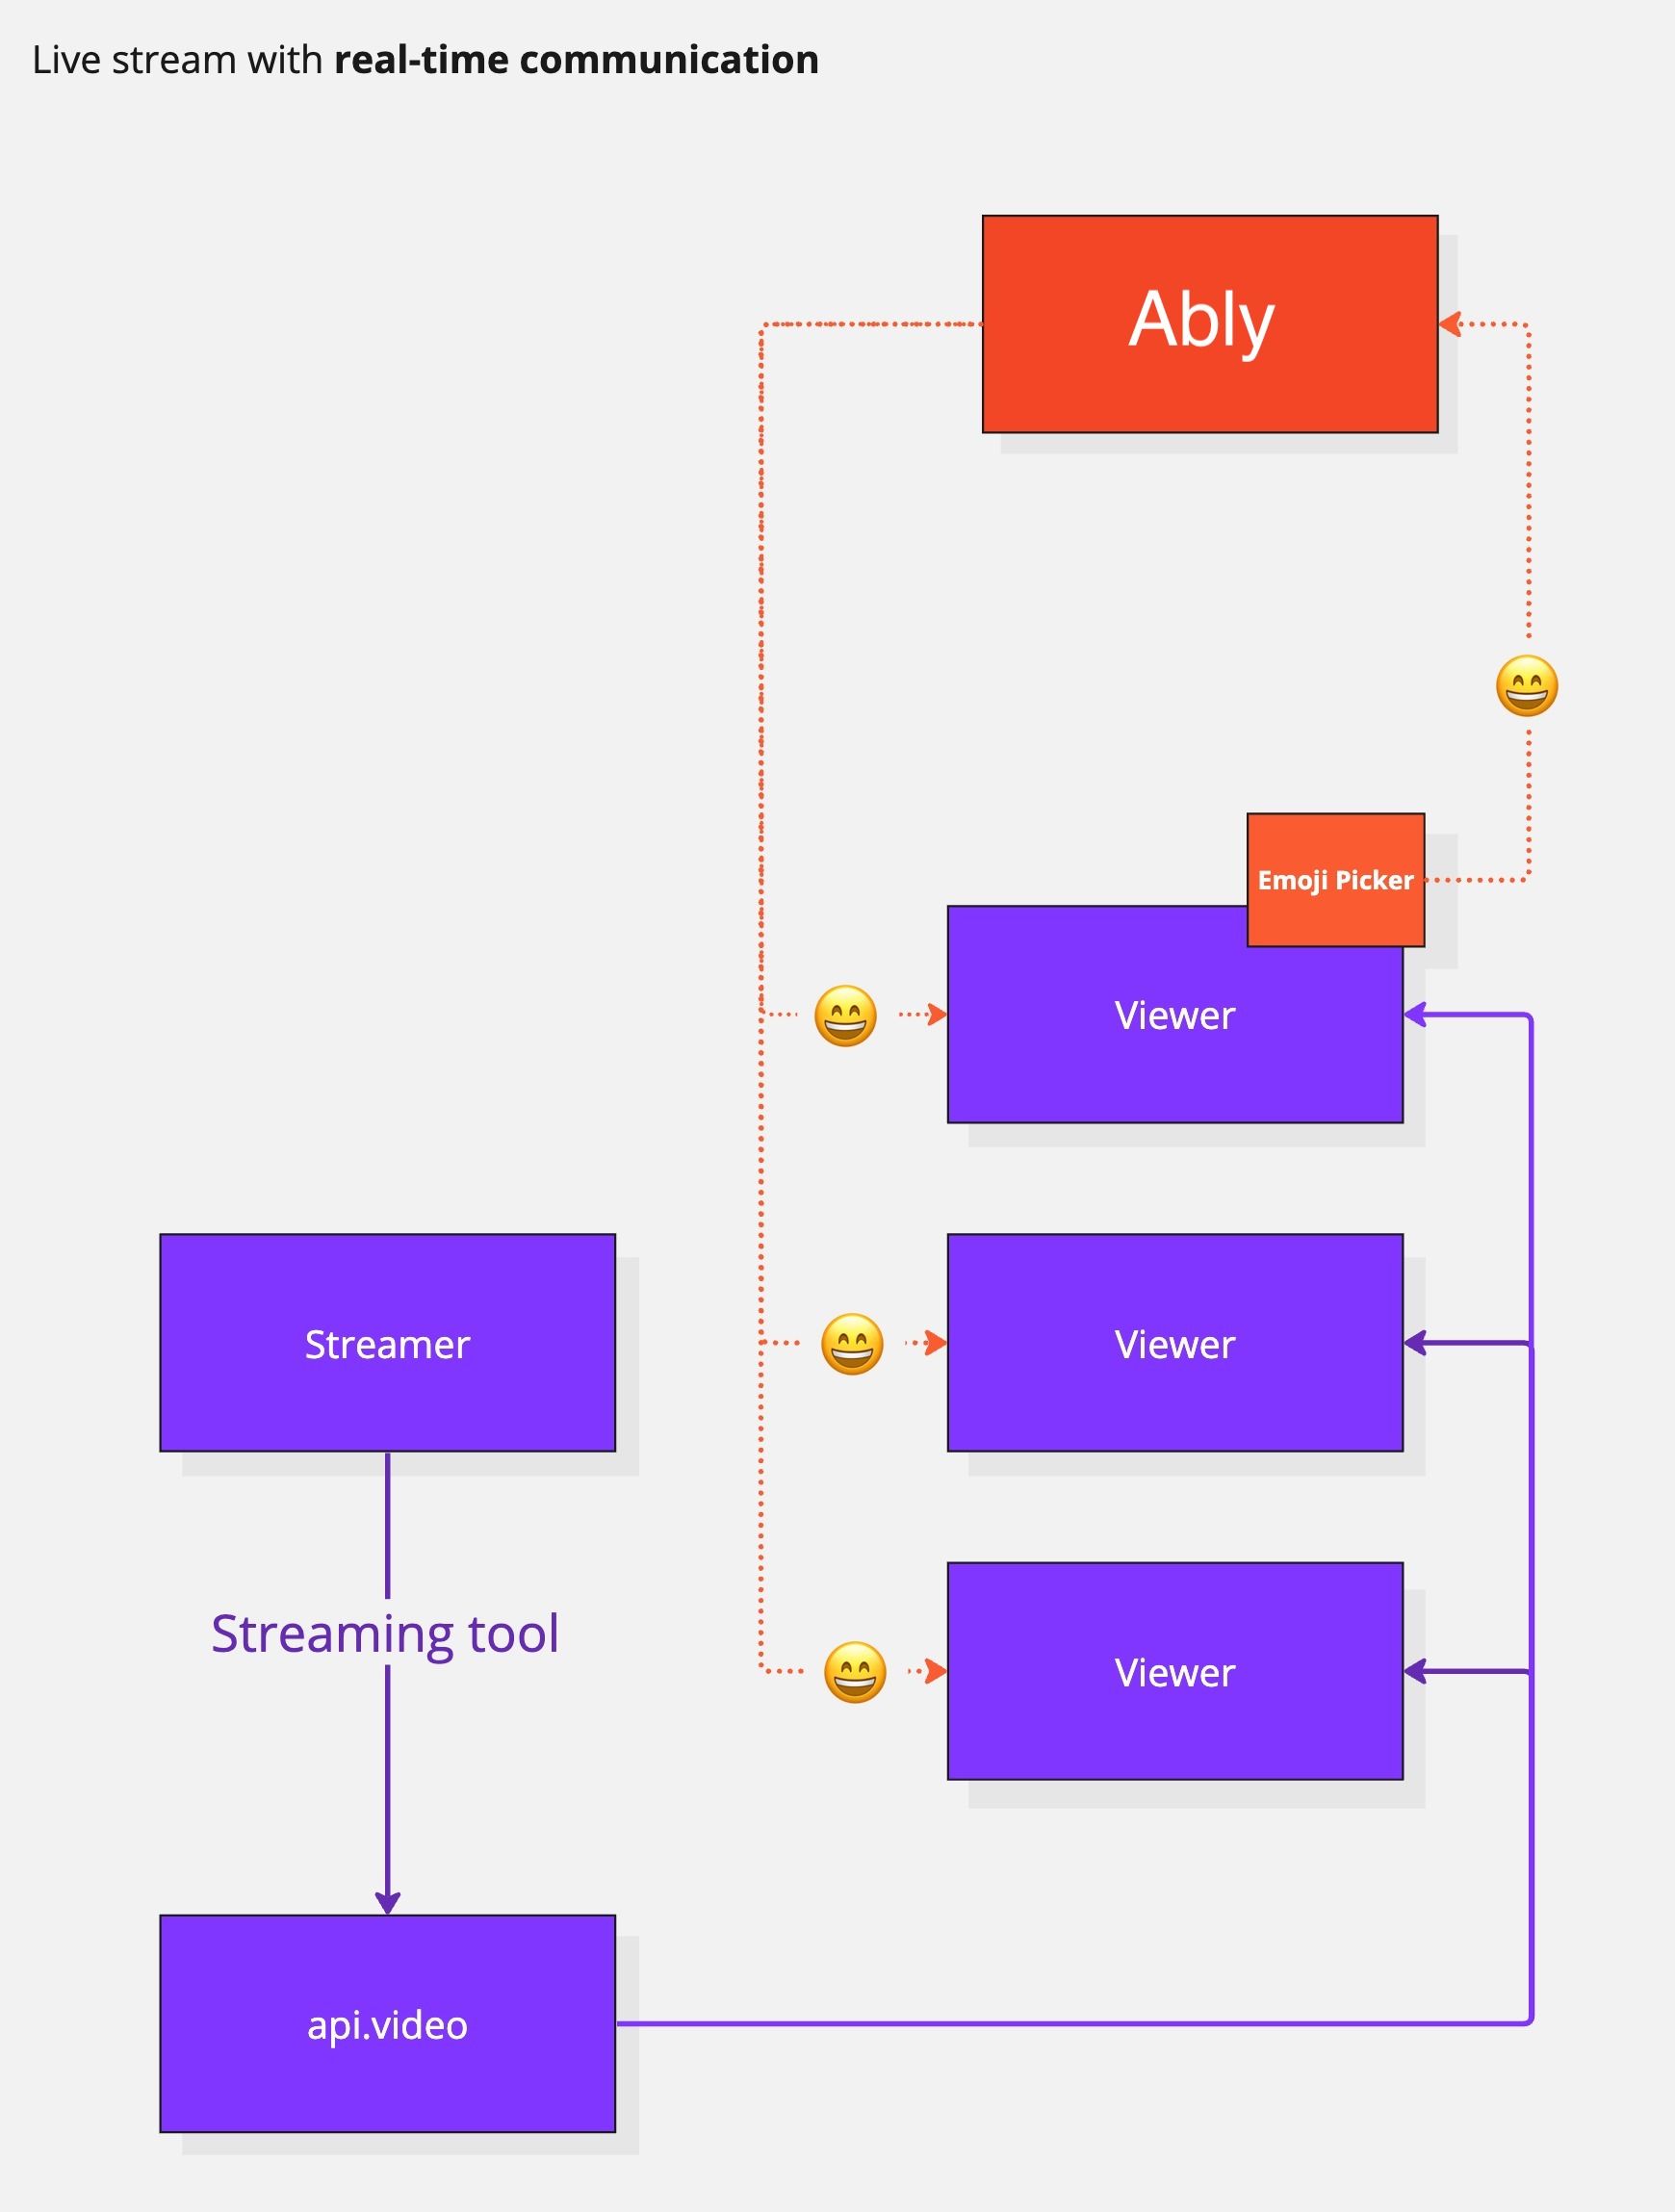
We’ll leverage api.video with Ably to create a real-time communication scenario where one viewer of the live stream will post an emoji, and all of the other viewers of the same live stream will be able to see the reaction.

Check out the diagram below on how this works:

livestream-with-realtime-communication-diagram-ably

Why do Livestream viewers need to be engaged?

Live streaming is growing at a very rapid pace. Let’s talk statistics:

Did you know that the revenue for the entire video streaming app industry reached $82.3 billion in 2022, and is projected to reach $115 billion by 2026. according to some resources it’s going to be $118 billion by 2025. (Business of Apps)

Live commerce-initiated sales could account for as much as 10 to 20 percent of all e-commerce by 2026 (McKinsey) and 41.2% of consumers said they tune in to live streams focused on home products, and 37.5% said they watch live shopping events for electronics (Retail Touchpoints).

In 2022, there were 532 million esports viewers worldwide (Insider Intelligence).

52% of live video viewers stream content through social media (eMarketer).

Brands earn nearly 40% more engagement with Instagram Reels compared to other Instagram content formats (Business Wire).

And this is just a small part of some impressive live stream and video content statistics. So you ask yourself, how do I start integrating livestream into my app or website?

How to build a scalable and engaging live stream quickly?

What we’ll be leveraging:

With api.video, you can integrate livestream into any project in a few minutes. You can find the article on how to get started here: https://docs.api.video/docs/create-a-live-stream

We’ll start with this simple example that was built using Next.js. You can go ahead and clone it from here: https://github.com/apivideo/livestream-with-realtime-ably

Let’s break it down; what are we looking at here?

The api.video React Player module

We are using api.video in order to create a stream and then the api.video React player SDK in order to create a responsive on-screen video delivery while removing the control elements.

If you navigate to the src/pages/index.tsx file, here’s where we consume the player and buildout the video delivery:

We consume the api.video React player SDK here: import ApiVideoPlayer from '@api.video/react-player';

And we pass it as a component to be rendered:

javascript

Disclaimer! In this example, the streamId is hardcoded in the index file, however, you’ll probably want to serve the streamId dynamically from your backend when you get to production.

You can notice that we are passing the ApiVideoPlayer component all of these parameters; let’s break it down a bit; I’ll focus on the important ones:

  • With Style, we are passing CSS parameters in order for the video to fit the screen first while the size parameter is dynamic, as size is a state:

javascript

Each time you resize the window, the video player size will adapt to the size of the screen.

  • chromeless parameter removes all the player controls, which will give the user a better experience.
  • With the video parameter, we are passing an object that includes the stream id and the optional parameter live that is set to true in order to give the player the indication that we are passing in a live stream and not a video

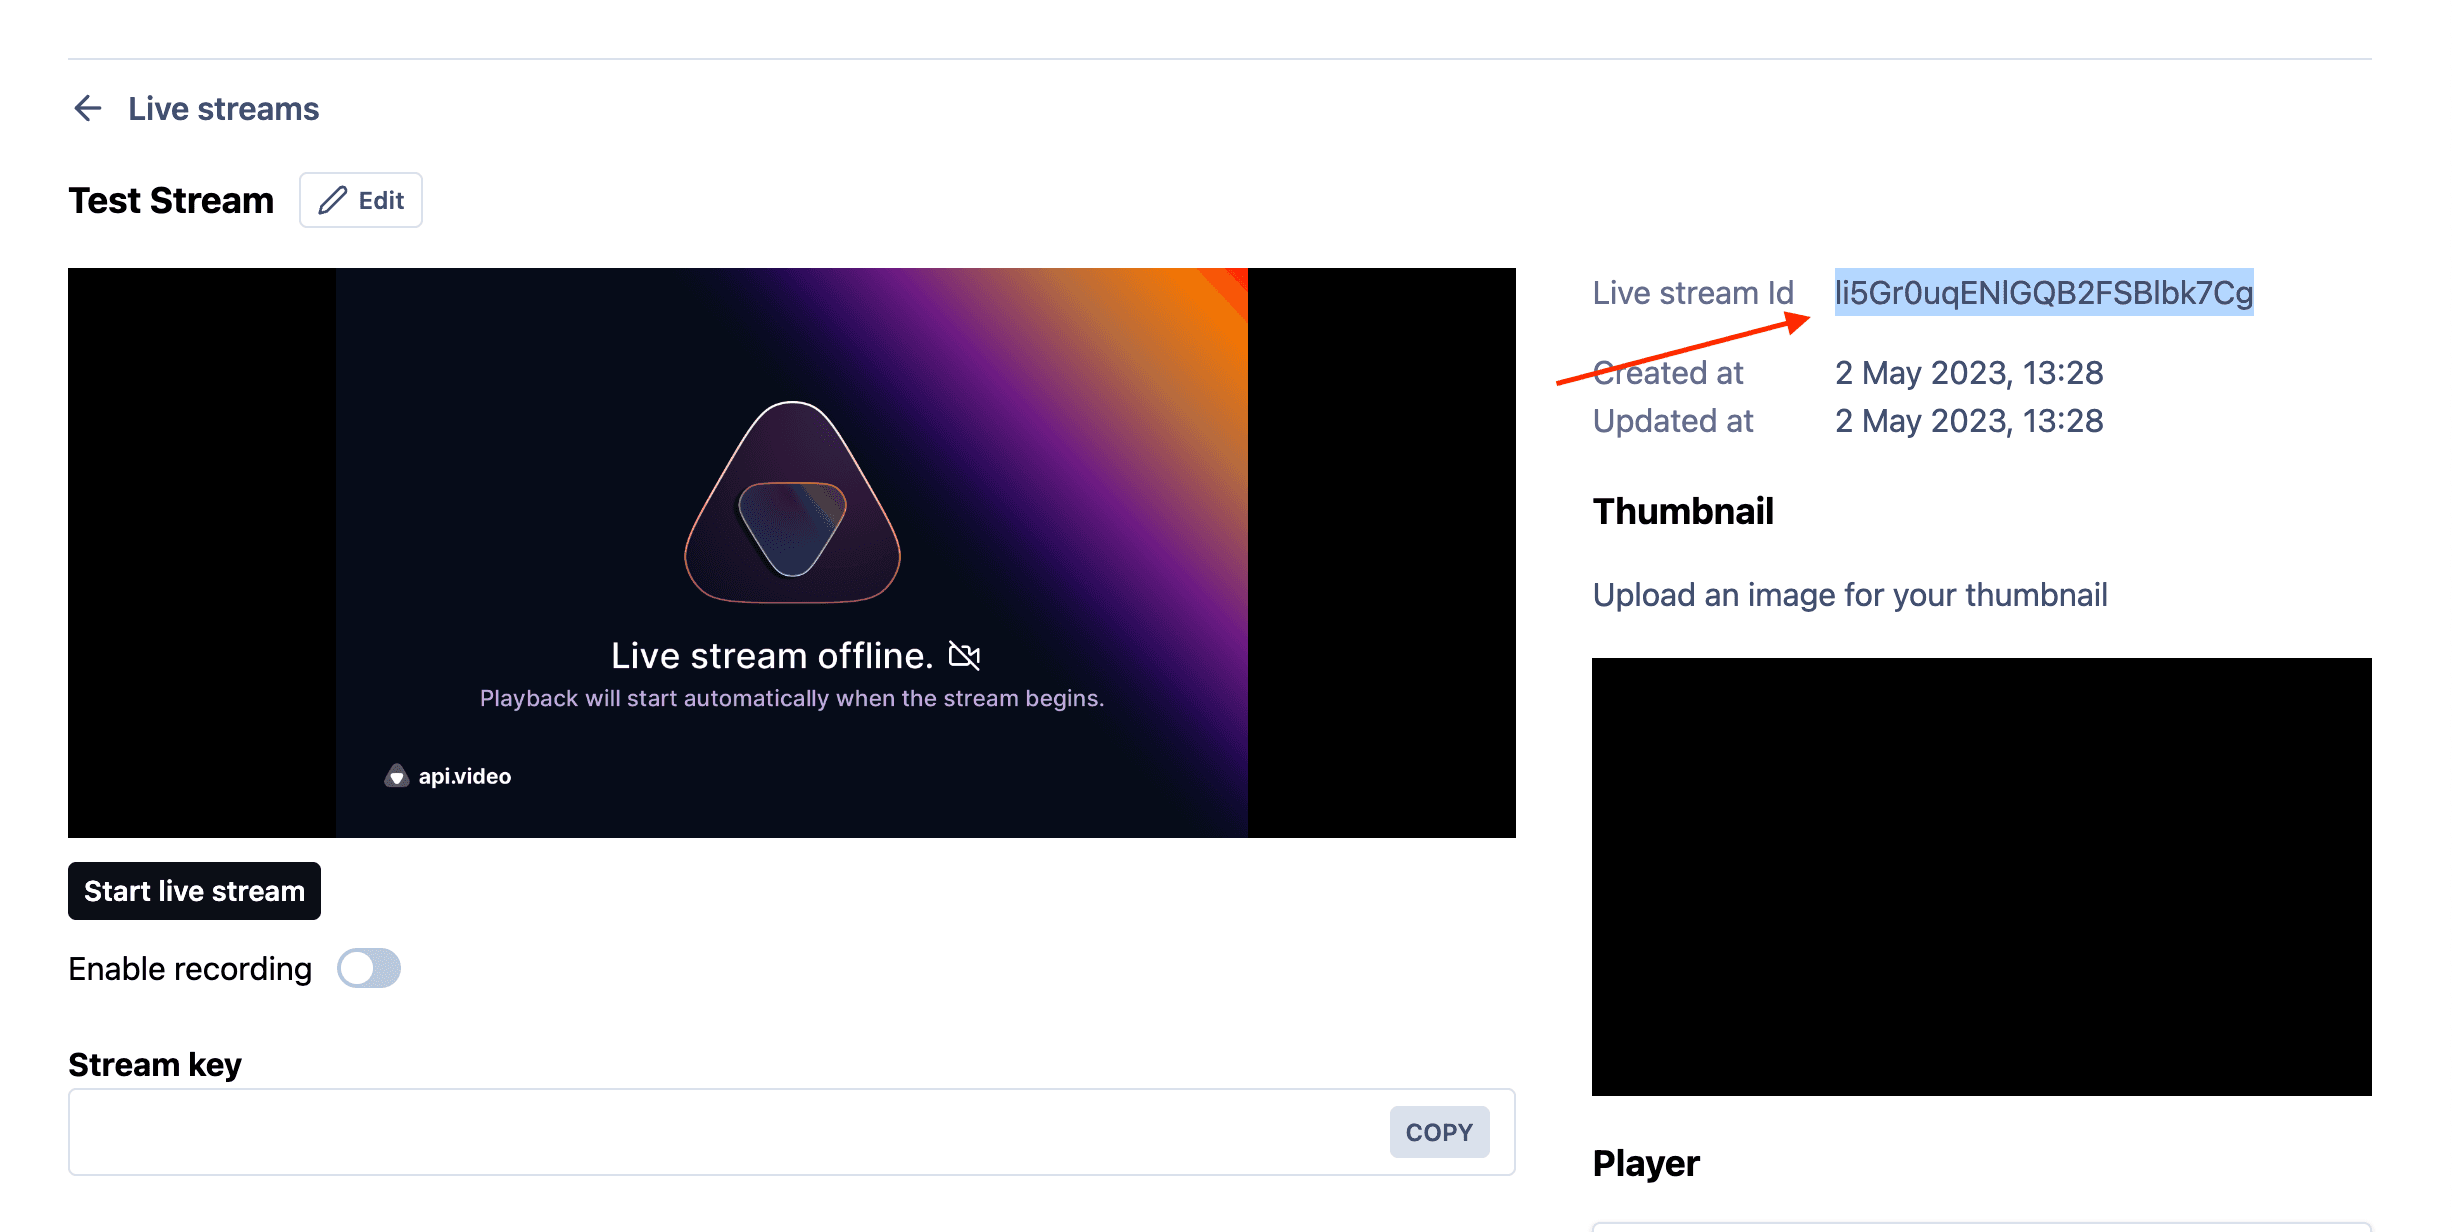
Getting the live stream id can be done in two ways.

Programmatically:

  1. You can leverage the livestream endpoint in order to get the list of livestream ids from your workspace: https://docs.api.video/reference/get_live-streams

json

  1. You’ll get a JSON response from which you can get the stream id you need:

json

Manually from the dashboard:

  1. Click on the live stream in Live Streams
get-livestream-id
  1. Get the live stream id
copy-livestream-id-from-dashboard

You can find more information about the api.video React Player in our documentation: https://github.com/apivideo/api.video-react-player

Everyone loves Emojis!

Now let’s get to the fun part; the example gives you the ability to share emojis between all the viewers of the stream; each person in the stream gets an emoji picker; once the emoji is clicked, a cool little animation will play where the emoji is hovering and then disappearing. The cool thing about that is that the animation will be played to all the viewers.

demo

This example is very basic; however, you can take the example and expand on it in order to create real-time statistics for the live stream session, for example:

  • Count the reactions from the users
  • Map the different reaction emojis and get the timeframe with the most reactions
  • Get real-time feedback from the users
  • And more

The emoji animation is built with React Simple Animate https://www.npmjs.com/package/react-simple-animate, it has a bit of complex logic, but you are free to reuse it in your app. You can find the actual animation parameters in src/utils/randomframevalues.tsx

The random values are being passed to the <AnimateKeyframes> component that includes the actual emoji:

javascript

Go ahead and play around with the random values and the parameters, should be fun 😃

Spread the emojis

And now we get to the challenge, how do you get these emojis across to all other users? this was an interesting task, but with Ably, it wasn’t that difficult to implement.

We created a new class that is called MessageHandler where we use the Ably node library:

import Ably from 'ably';

Ably has a great API that allows you to create channels, get users to subscribe to them, and then broadcast and listen to any events that happen inside these channels; that’s a great fit for our use case!

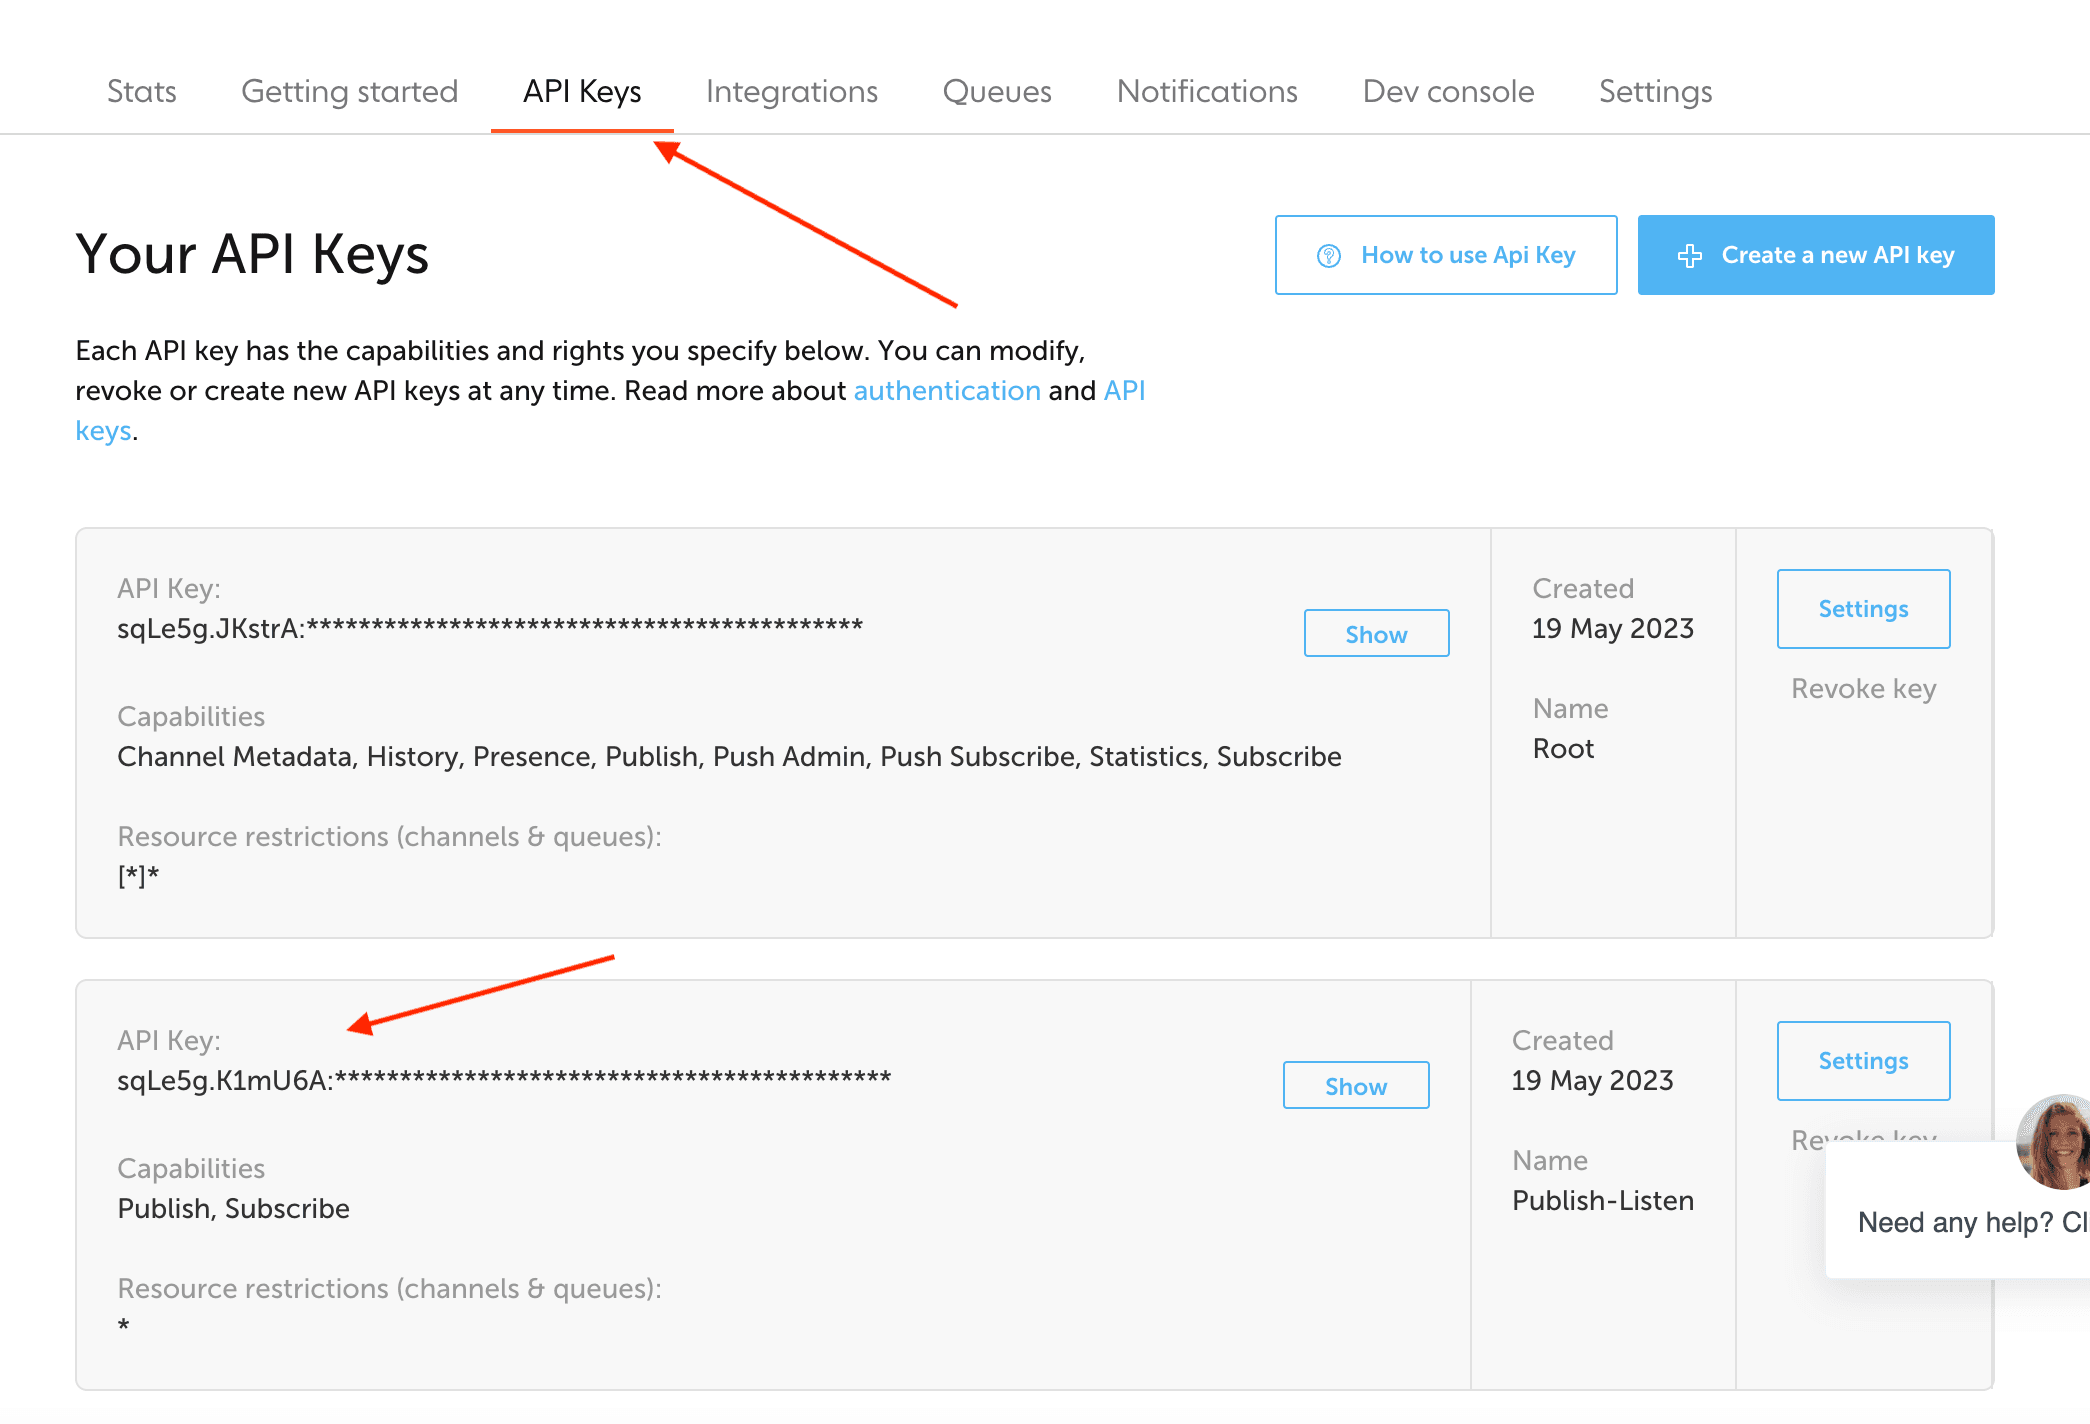
In the example, all you need to do is to replace the values of the #apiKey with the one that you get from Ably:

javascript

get your api key screenshot

Disclaimer! Please note that these keys should be consumed from the backend. In this example, just to make it easy, we expose the keys on the front end. Please ensure that the backend serves the keys when you go to production.

Briefly on what we are doing in the MessageHandler class:

When we use Ably there are a few things we need to understand and utilize:

  • Channels
  • Users
  • Subscriptions (listeners)
  • Message publishing

Every time the user opens a new window, they will be assigned a user id for a session (this logic works in the index.tsx file); the userId is passed to the class when it is initialized in order to create a unique user id for each user that watches the stream.

Then we use the stream id as the channel id for Ably, of course, you can generate any channel id, however, it’s easier to just leverage the values that we already have.

We then subscribe to the same channel and also broadcast the messages to it at the same time.

The caveat is that we set the listener in the /src/components/emoji.tsx file, if you look closely at the listener, we have a logic that will make sure that the listener is not getting duplicated. We check if there are no listeners created already; if there aren’t, we create one. This situation is caused by the fact that each time the state changes, React will re-render and will run the same code again, causing the listener to be created multiple times, so we do something like this:

javascript

Finally, we have two functions to generate the message (which will include the emoji) and publish the message to the channel.

Now that you know how it works, you can run the example and play around with it. Just make sure to install all the dependent modules by running npm install or yarn install

After the installation is done, run the example by npm run dev

The example will run on localhost:3000

Happy Hacking! 🙂

If you have any questions about the article, feel free to raise issues on the Github repo, reach out to me directly: artem@api.video, or just open a ticket with our support team.

Try out more than 80 features for free

Access all the features for as long as you need.
No commitment or credit card required

Video API, simplified

Fully customizable API to manage everything video. From encoding to delivery, in minutes.

Built for Speed

The fastest video encoding platform. Serve your users globally with 140+ points of presence. 

Let end-users upload videos

Finally, an API that allows your end-users to upload videos and start live streams in a few clicks.

Affordable

Volume discounts and usage-based pricing to ensure you don’t exceed your budget.