Tutorials · 9 min read
Sharing a video: sending a video via live stream
Video on demand (VOD) is a great way to give your customers a way to watch videos when *they* want to watch them. But what if you want that recorded video to be played at a specific time? This is not possible with VOD, but is possible with a video live stream. In this post, we'll walk through the steps required to convert a recorded video into a video live stream for scheduled playback.
Doug Sillars
February 9, 2021
Video on demand (VOD) is a great way to give your customers a way to watch videos when they want to watch them. But what if you want that recorded video to be played at a specific time?
- Maybe you are have a scheduled event at an odd hour, and you do not actually need to be present.
- A “replay event” of a live stream that occurs 1 hour later for viewers in other parts of the world.
- A “video share” party where a group of people can watch a video.
This is not possible with VOD, but is possible with a video livestream. In this post, we'll walk through the steps required to convert a recorded video into a video livestream for scheduled playback. You can also check out our live stream API Reference documentation.
Broadcasting a VOD
There are 3 things you’ll need to do a basic VOD broadcast:
- A livestream: When you livestream with api.video, you’ll need to create a livestream that will be used to broadcast your video. You can also check out the API reference material for this endpoint here: Create live stream.
Once you’ve created a livestream for the video, you’ll need the parameters from the response - namely the streamKey and the iframe/player urls for your viewers to see the livestream.
-
A recorded video. You’ll want to have a video that you wish to send over the livestream. This can be a video local to your computer, but in this tutorial, it will be a file that has been uploaded to api.video. We’ll use the mp4 url for the streaming. The API reference doc for uploading a video is here: Upload a video.
-
FFMPEG You’ll also need FFMPEG installed on your computer. If you use a Mac, you can install via HomeBrew. FFMPEG is the tool that will help you take your VOD and convert it into a broadcast.
Ok, Now you have everything you need. In a terminal window on your computer, we’ll run a FFMPEG command:
ffmpeg -i <your video to be streamed> -preset ultrafast -tune zerolatency -f flv rtmp://broadcast.api.video/s/<livestream streamkey>
Ffmpeg will take an input (-i) of your video, and using an ultrafast and zero latency transcoding, create a flv (rtmp flash video) stream, and send it to the api.video RTMP stream.
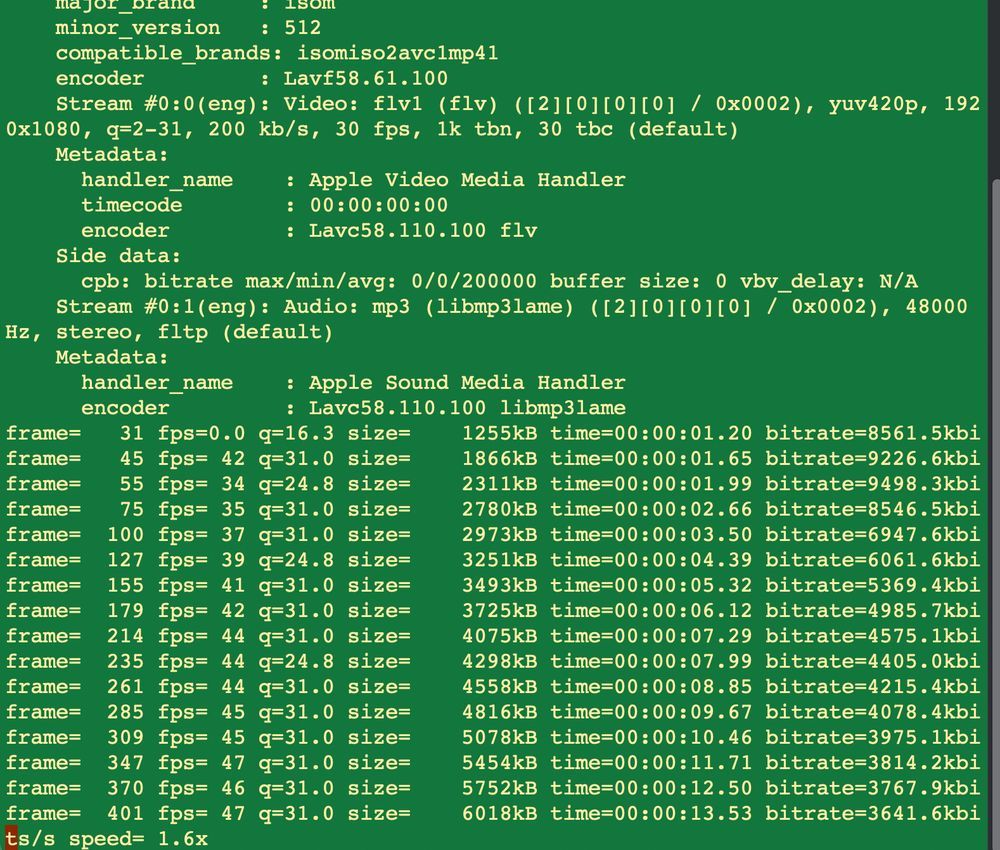
FFMPEG will start running, and spit out a lot of code into the terminal.. Here you can see that the video is being encoded and sent on.
That’s literally all you have to do to make this work.
I have scheduled broadcast at 8 AM, UGH!
Ok, what if you could automate this command to run right at 8am (and you can hit the snooze button one more time)? It is easy to do!
Create a Bash script with your command:
#!/bin/bash

ffmpeg -i class_recording.mp4 -preset ultrafast -tune zerolatency -f flv rtmp://broadcast.api.video/s/<livestream streamkey>
Then we’ll use crontab (Mac and Linux) to automate the command. Let's say class is Feb 10, at 8 AM.
Running
crontab -e
Opens the cronjob queue (probably in VIM). Type ‘i’ to begin typing, and enter:
00 08 10 02 * <path to your script>
This will run the script at 8 AM on February 10. To exit VIM, type
Looping a video in a livestream
Do you want to have a video on continuous loop? With api.video, you can do this with just our video player:
https://embed.api.video/vod/vi6xuvHolHxZQ5r6KETXAiR4#autoplay;muted;loop
Appending the autoplay, muted and loop parameters to the player url tells the api.video player to do all of these actions - the video will continuously playback for your users.
But if you want to have the loop in a livestream, this is possible as well:
ffmpeg -stream_loop <number of loops> -i https://cdn.api.video/vod/vi1UQBDAMqAPCRxB3dmw1thc/mp4/1080/source.mp4 -preset ultrafast -tune zerolatency -f flv rtmp://broadcast.api.video/s/1d1e7a11-14a6-4984-b6d4-0c9864aec3dd
Simply insert the -stream_loop in the beginning of your ffmpeg command, and add the number of additional plays afterwards (-1 is an infinite loop).
Sharing a movie
Ok - since we can have a livestream - we can now “share” a movie with others. Note: the videos are not perfectly synced (a work in progress), but we can all watch the same video - at approximately the same location for each of us.
We’ve sort of covered this idea with a class lecture - you might imagine all the students will be online at 8 AM to watch the class. But what if we wanted to do something fun?
We've built share.a.video, a demo app running NodeJS, that replicates the FFMPEG transcoding shown above, but on your remote server - and then gives a playback view where anyone with the url can watch the video. In the example, we use 'Big Buck Bunny' and `Sita Sings the Blues' (both Creative Commons licensed videos). The code is open sourced on Github
On page load - we look to see if the livestream is already broadcasting:
On the Node server, we have some of the video data hardcoded. To find out if the video is playing, we call the Livestream endpoint, and match the livestreamIds - what we are really interested in is the broadcasting parameter:
	//get data on both movies:
	const client = new apiVideo.Client({ apiKey: apiVideoKey });
	let allLiveStreams = client.lives.search();
	var videos =[{
		"name": "Big Buck Bunny",
		"livestream": "li6ndv3lbvrZELWxMKGzGg9V",
		"broadcasting":false,
		"iframe":"",
		"thumbnail":"",
		"description": "Big Buck Bunny is a free and open source movie, created by Blender, and released under Creative Commons 3.0."

		},{
			"name": "Sita Sings the Blues",
			"livestream": "li7e2ePBRYKY6AOfPU8HSt91",
			"broadcasting":false,
			"iframe":"",
			"thumbnail":""
			,
		"description": "Sita Sings the Blues is a an open source movie, created by Nina Paley, and released under CC-BY-SA."
		}];


	allLiveStreams.then(function(liveList){
		//console.log(liveList);
		for(var i=0;i<liveList.length; i++){

			//set iframe thumbnail and broadcasting status for each video
			if(liveList[i].liveStreamId === videos[0].livestream){
				videos[0].broadcasting = liveList[i].broadcasting;
				videos[0].thumbnail = liveList[i].assets.thumbnail;
				videos[0].iframe = "iframe src='" +liveList[i].assets.player +"' width=\"100%\" height = \"100%\" frameborder=\"0\" scrolling=\"no\" allowfullscreen=\"true\"";
			}else if(liveList[i].liveStreamId === videos[1].livestream){
				videos[1].broadcasting = liveList[i].broadcasting;
				videos[1].thumbnail = liveList[i].assets.thumbnail;
				videos[1].iframe = "iframe src='" +liveList[i].assets.player +"' width=\"100%\" height = \"100%\" frameborder=\"0\" scrolling=\"no\" allowfullscreen=\"true\"";
			}

		}
		console.log(videos[counter]);
			return res.render('index', videos[counter]);
																	 \
We return the JSON array of video data to the web application. The application is built with Pug, and we can use logic from the broadcasting variable to decide what is displayed:
    if broadcasting
      h1 The Movie has already started. Click the image to enter the theatre.
      p
      h2 Make sure your phone is silenced.
      #video-player
        #thumb-live-indicator.active
        #videoDiv
          #{iframe}
        #imageDiv.hidden
          #{livestream}
    else
      h1 Click the image to begin the livestream.  It'll take a few seconds to buffer up, and then we'll get you into the theatre.
      p
      h2 Make sure your phone is silenced.
      #video-player
         #thumb-live-indicator
         #videoDiv.hidden
           |#{livestream}
         #imageDiv
          img.image(src= thumbnail)
  if broadcasting
    #video-title.active
      p Video is playing Click Image to enter the theatre
  else
    #video-title
      p #{description}
If broadcasting = true, we display a page that lets viewers enter the video playback. If broadcasting=false, we invite viewers to click the image, and start the livestream.
When you start the livestream, we call the "start" endpoint, which will start the livestream. We decide which movie is being started, and then use FFMPEG commands (similar to those above) to do the VOD-> live transcoding on the server:
																 ```
																 	//ok this will kick the video stream off
	console.log(req.body);
	var videoToStream = req.body.movie;
	//counter for array data BBB=0, SSTB =1 (more will go from here)
	var counter = 0;
	if(videoToStream==="sstb"){
		counter =1;
	}
	console.log("video to stream:",videoToStream );
	var videoLink = videoUrls[counter];
	var rtmpDestination = "rtmp://broadcast.api.video/s/"+streamKeys[counter];

	var ops = [
		'-i', videoLink,
		  '-preset', 'ultrafast', '-tune', 'zerolatency',
			'-f', 'flv', rtmpDestination
	];


	console.log("ops", ops);
	ffmpeg_process=spawn('ffmpeg', ops);
	//ffmpeg started
	console.log("video stream started");

	ffmpeg_process.stderr.on('data',function(d){
		console.log('ffmpeg_stderr',''+d);
	});

	//
	 res.sendStatus(200);
																 ```
When the video stream starts, we head back to the client side of the app for another cool trick.
A livestream requires about 15 seconds of video to be transcoded before it is live - so if we opened the livestream URL right away, viewers would get an error. So, we play a little trick when we get the response from the server:
```
 oReq.onload = function (oEvent) {
        console.log("video started: ",movieUpload );
        var livestreamid  = document.getElementById("videoDiv").innerHTML;
        document.getElementById("videoDiv").innerHTML="";
        console.log("liveid", livestreamid);
        var videos = ['vi74TmfoJyPmVJVnIl4jzMLA', livestreamid];

        //now we create the player
        //since the livestream can take some time to start - we'll kick off with the 10 second countdown video
        var counter = 0;
        createVideo(counter);
        document.getElementsByClassName('image')[0].style.display= 'none';
        document.getElementById('thumb-live-indicator').className = "active";

        //code lifted from playlist demo
        function createVideo(counter) {
            console.log("video", counter +videos[counter]);

            var vodOptions = {
                id: videos[counter],
                 autoplay: true
                 // ... other optional options s
             };
             var liveOptions = {
                id: videos[counter],
                 autoplay: true,
                 live: true
                 // ... other optional options s
             };
             videoOptions = vodOptions;
             if(counter >0){
                 //live video
                 videoOptions= liveOptions;
                 //add teh sync button
             //   liveSync();

             }
            console.log("player options", videoOptions);

            window.player = new PlayerSdk("#imageDiv", videoOptions);
            player.addEventListener('play', function() {
                //console.log("playing");
                onPlay(counter);
            });
            player.addEventListener('ended',function() {
                console.log("ended");
                counter ++;
                //if we hit the end of the array - start over again

                onEnd(counter);
            });

        }


        function onPlay(counter) {
           // console.log("onPlay");
            console.log("counter" ,counter);

            console.log("video playing");
        }
        function onEnd(counter){
            //console.log("onEnd");

            //console.log("video over");
            player.destroy();
            //video is over - so start another one...
            createVideo(counter);
        }
        //end code lifted from playlist demo


}
```
We create a video playlist - where the first video is a 10 second countdown - like from the movies, and the 2nd video is the livestream.
This gives the live video enough time to build up a buffer and be ready to play, and makes for a fun experience for viewers.
Conclusion
In this post, we've walked through several different ways to convert a recorded video into a livestream, all using FFMPEG in the background. We've covered a basic command line implementation, and then shown how to schedule that same command.
We've also built a sample application based on NodeJS at share.a.video that does the same thing, but on a remote server, and has built in webviews to start and watch the videos.
If you still have questions (or want to share how you are piping recorded video into a livestream) - join the conversation on our community forum.
And if you want to check out our reference documentation, the live stream content is available here: Live Streams. Fianlly, if you still haven't created an api.video account, you can do that in just a few second here. Thanks for reading!
YOU MIGHT ALSO LIKE
LATEST ARTICLES
Tutorials · 8 min read
What is a webhook and how to use webhooks for real-time video management
Answer critical questions like what are webhooks, how they work, and how you can use them for video management.
api.video · September 12, 2024
Tutorials · 4 min read
How to build AI facial expression detection into your videos with React
Learn how to add AI facial expression detection to your videos using one of Javascript's powerful libraries, React.
Yohann Martzolff · June 26, 2024
Tutorials · 4 min read
How to integrate AI facial expression detection to control your video – Javascript
Learn how to add AI facial expression detection to your videos using Javascript.
Yohann Martzolff · June 25, 2024
Try out more than 80 features for free
Access all the features for as long as you need.
No commitment or credit card required
Video API, simplified
Fully customizable API to manage everything video. From encoding to delivery, in minutes.
Video API, simplified
Fully customizable API to manage everything video. From encoding to delivery, in minutes.
Built for Speed
The fastest video encoding platform. Serve your users globally with 140+ points of presence.
Built for Speed
The fastest video encoding platform. Serve your users globally with 140+ points of presence.
Let end-users upload videos
Finally, an API that allows your end-users to upload videos and start live streams in a few clicks.
Let end-users upload videos
Finally, an API that allows your end-users to upload videos and start live streams in a few clicks.
Affordable
Volume discounts and usage-based pricing to ensure you don’t exceed your budget.
Affordable
Volume discounts and usage-based pricing to ensure you don’t exceed your budget.