Tutorials · 5 min read

Heroku and api.video logos

Build an api.video demo with Heroku

Have you tried our demos at a.video? Have you wanted to launch a demo app using your api.video credentials? In this post, we'll walk you through the steps to launch your own version!

Doug Sillars

October 20, 2021

We've launched a number of demos at a.video to demonstrate the power of api.video's APIs and our video in the cloud service. We have apps featuring video uploading, video streaming and also mashup collaborations that include auto-captioning, video moderation, live video chat and others with some select partners.

You might want to launch one of these demos for your own application or process - using your api.video account. In this post, we'll walk through the steps we use to launch new demos for a.video, and if you follow along, you can launch your own versions in your Heroku account.

Heroku

Heroku is a service that makes it easy to spin up a server, add your code, and launch a service on the internet. We use Heroku for all the a.video demos, so will walk through the steps we perform in order to launch our demo applications.

record.a.video

The record.a.video demo has been very popular. It allows you to record your screen and camera right from the browser. You can choose to send that feed to api.video as a live stream, or record the video, and send it to our video hosting platform for later on demand viewing.

In this post, we'll take the record.a.video code from Github, and launch our own personal version of the application on Heroku. At that point, you can update the page to match your expected user experience, and have a working app with just a little bit of work.

First off, we'll want to grab the code from Github. Head to the recordavideo repository, and fork it into your account:

Screenshot analytics

You should now have the repository in your account, with the format https://github.com/<your accountname>/recordavideo.

Before we can go live, the app uses a few api.video configurations that are set to the team's account, and you'll want to switch to yours.

There are a couple of ways to do this - you can clone the repository to your machine to make the edits (and then push the fixes back to Github). If you 've used Github a lot, this will feel like second nature. For those who have not used git regularly, you can manually change 3 lines of code using the web interface.

We need to change the first 3 lines of /public/index.js.

RTMP_url = 'rtmp://broadcast.api.video/s/30087931-229e-42cf-b5f9-e91bcc1f7332';
live_url = 'https://embed.api.video/live/li400mYKSgQ6xs7taUeSaEKr';
delegated_token = 'tompBU8ZJcUCEsKGxxoBydh';

Record a video allows you to livestream, or upload a recorded video. The RTMP_url and live_url are used for live streaming. The video from the browser is sent to the RTMP_url, and then the broadcast is visible from the live_url.

  • To set these up, you must create a livestream using our API. We have a tutorial using cURL to help you create a live stream. This will give you the RTMP and live URLs to update lines 1 and 2.
  • Next, we'll create a delegated token, for the video on demand upload option. For this, we'll use the generate upload token API endpoint - (and the corresponding curl tutorial.

Once you've updated the public/index.js with your values, we're ready to launch on Heroku.

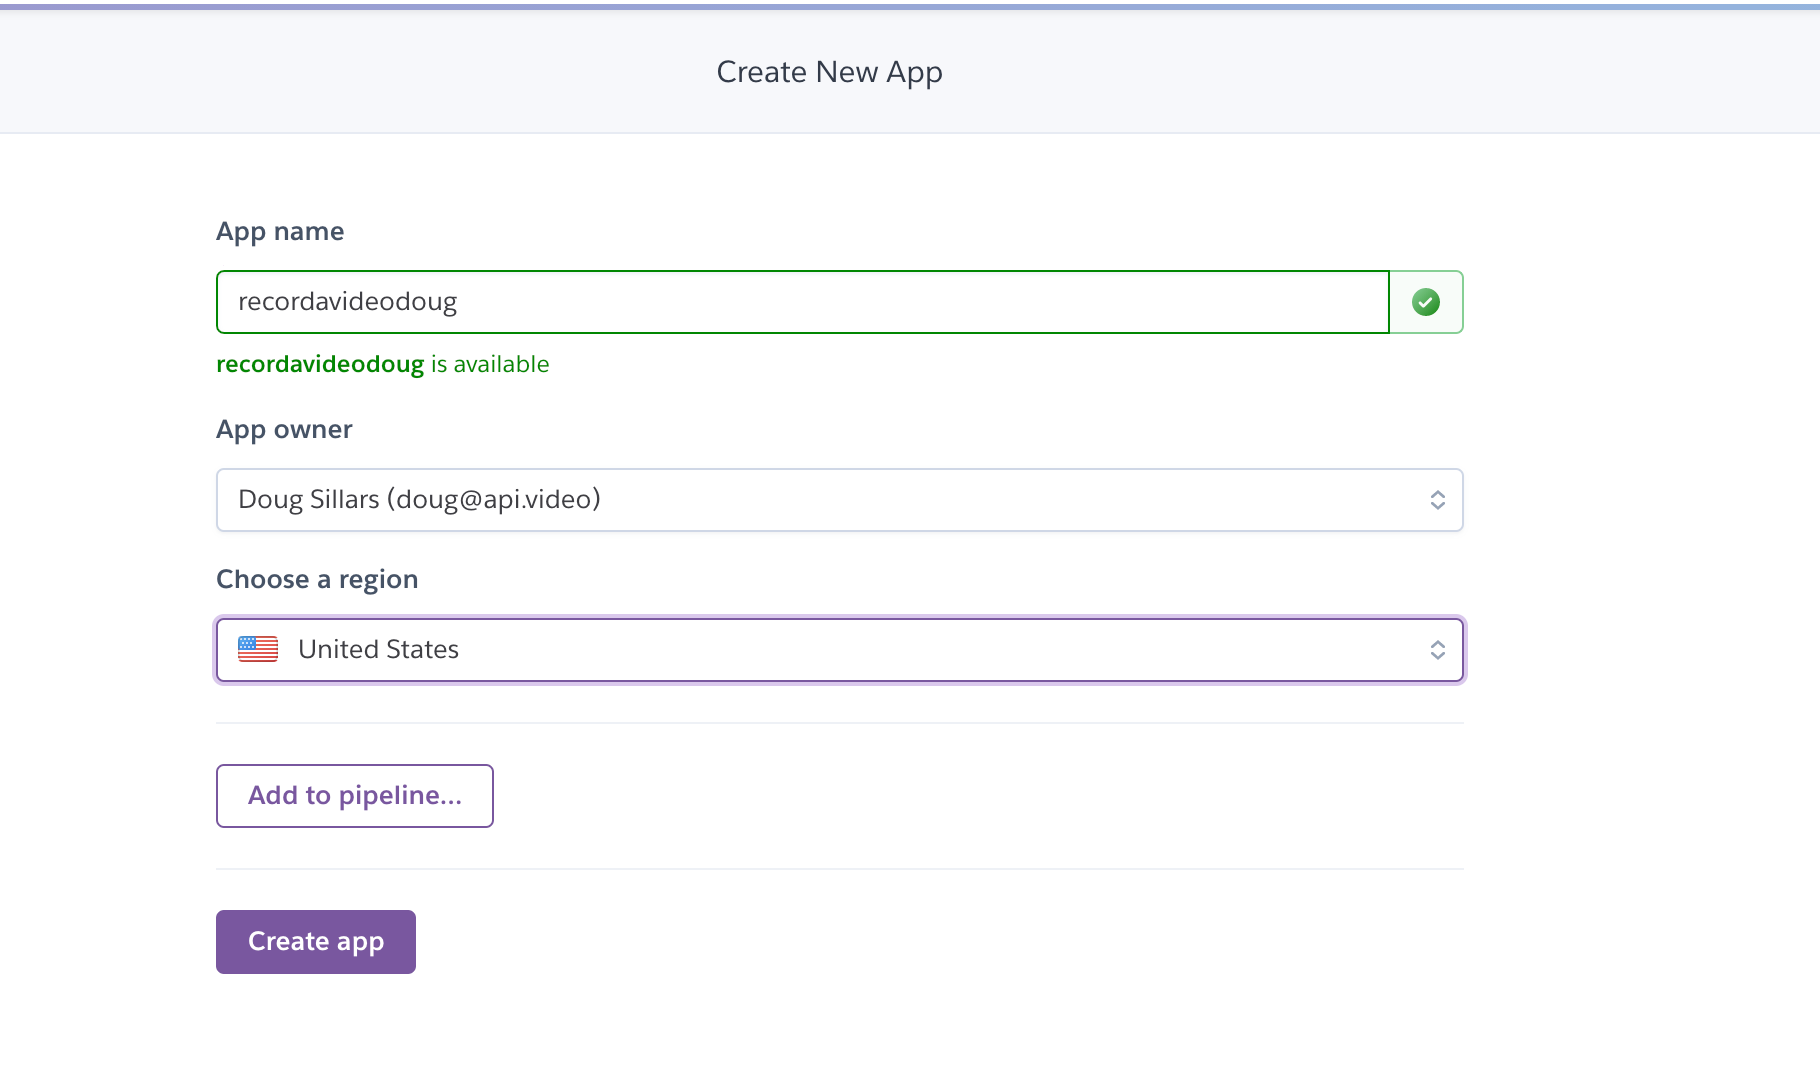
Create a free account (or login) to Heroku. You'll land at your dashboard, and in the upper right corner is a button "New." Choose "Create new app" from the menu.

The name "recordavideo" is taken, so pick another descriptive name for your application:

Create new app dialogue

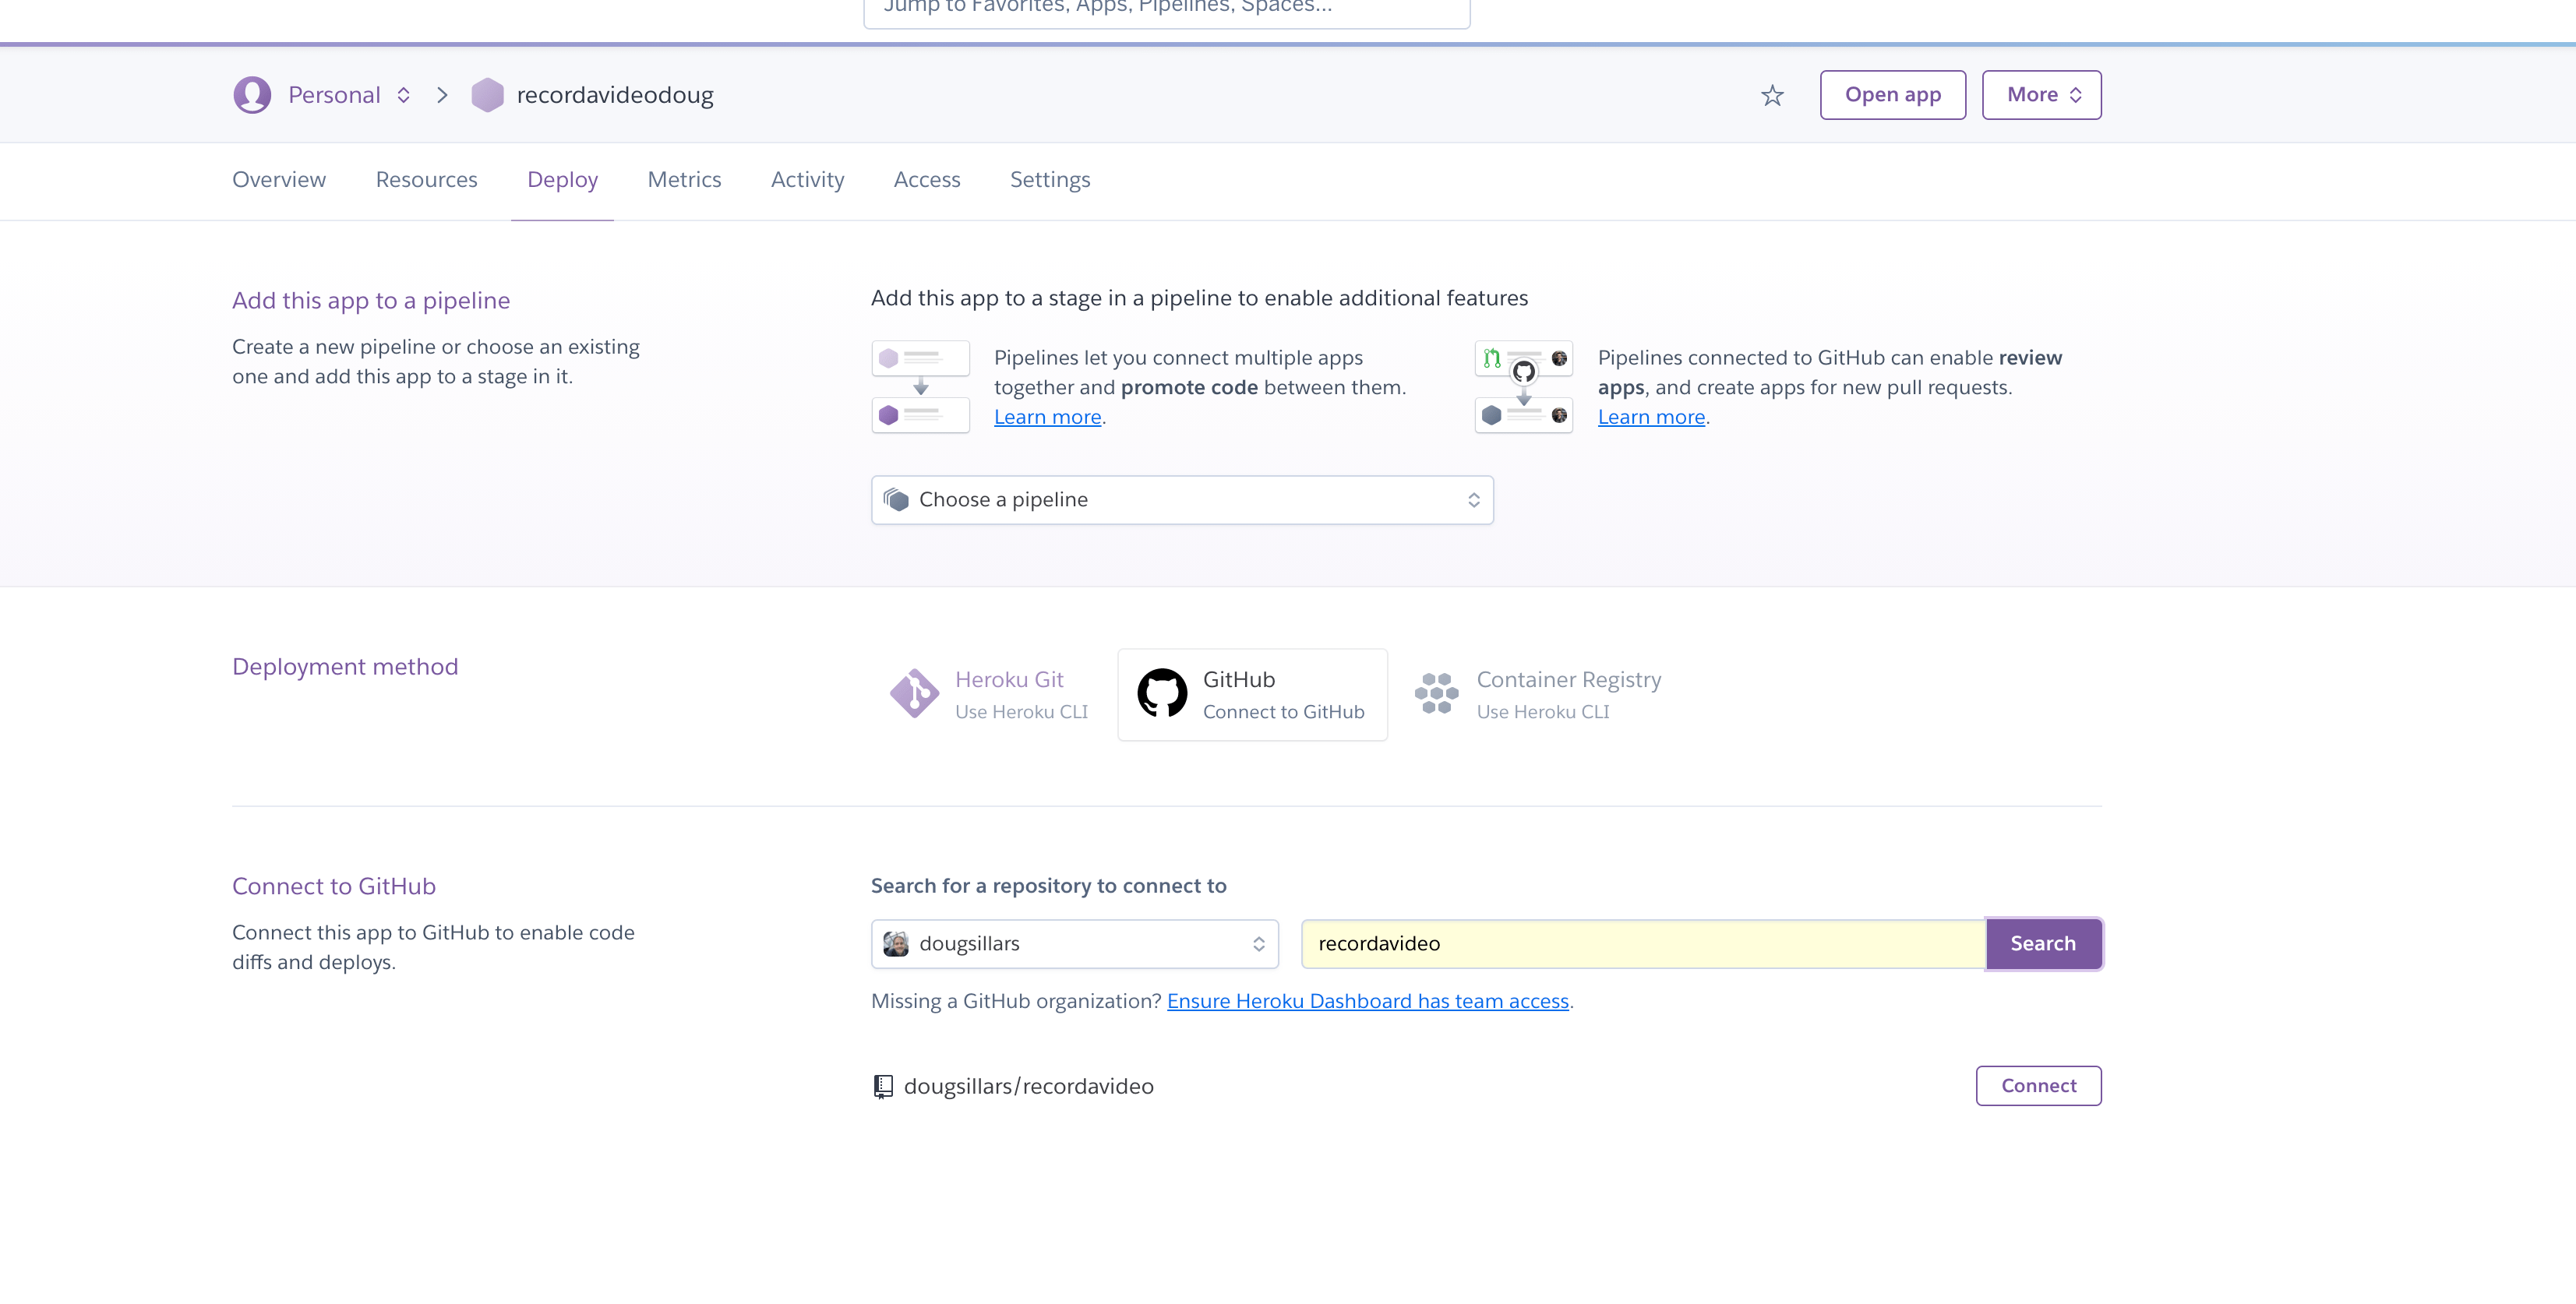
Once you create the application, you'll land at the Heroku dashboard for the app, in the "Deploy" section. We want to deploy via Github, so in the center, click the Github logo. Then, choose the Github account and search for the repository you wish to deploy. In the screenshot below, I have selected repordavideo in the dougsillars github account:

deploy dashboard screenshot

Once you connect your repository, you can set it up to automatically redeploy when changes are made in Github. Enable this, so when you do update the UI/UX, it will automatically appear in the launched app. You can also manually deploy the repository from here.

Settings

Move to the Settings tab in the dashboard to further configure your server. The record.a.video application uses ffmpeg on the Node server - it transmuxes the video from the canvas on the screen into RTMP for api.video. We need to tell Heroku to install FFmpeg. There is a buildpack already created https://github.com/jonathanong/heroku-buildpack-ffmpeg-latest.git so we'll add it. Then we will add the NodeJS buildpack.

buildpacks screenshot

Note: the buildpack for the language must be the last one on the list. If the order is reversed, your app will not build.

In the table above, you can add any environmental variables (there are none in this app, but many NodeJS apps use process.env. to reference API keys and other values that should not be published into github, or left referenced in code.

For example:

const apiVideoKey = process.env.apiProductionKey;

You would have apiProductionKey in these variables - referenciung your api video production API key.

setting environmental variables

With all these settings made, you can now go back to the "deploy" tab and manually deploy your application. Once that is completed, you can visit the URL listed in the settings page to run your own copy of record.a.video (or whichever app you copied).

Bonus steps

If you have a domain you;d like to use, the Settings tab allows you to set a domain that will point to this app's instance. You'll need to do CNAME DNS work to make this all happen, but this is how we get our apps to point to our a.video subdomains.

Conclusion

That's all there is to it - simply pick your app, fork it, and update to your API keys/ settings, and follow the steps to deploy on Heroku.

Try out more than 80 features for free

Access all the features for as long as you need.
No commitment or credit card required

Video API, simplified

Fully customizable API to manage everything video. From encoding to delivery, in minutes.

Built for Speed

The fastest video encoding platform. Serve your users globally with 140+ points of presence. 

Let end-users upload videos

Finally, an API that allows your end-users to upload videos and start live streams in a few clicks.

Affordable

Volume discounts and usage-based pricing to ensure you don’t exceed your budget.