Product updates · 4 min read
The New api.video WordPress Plugin
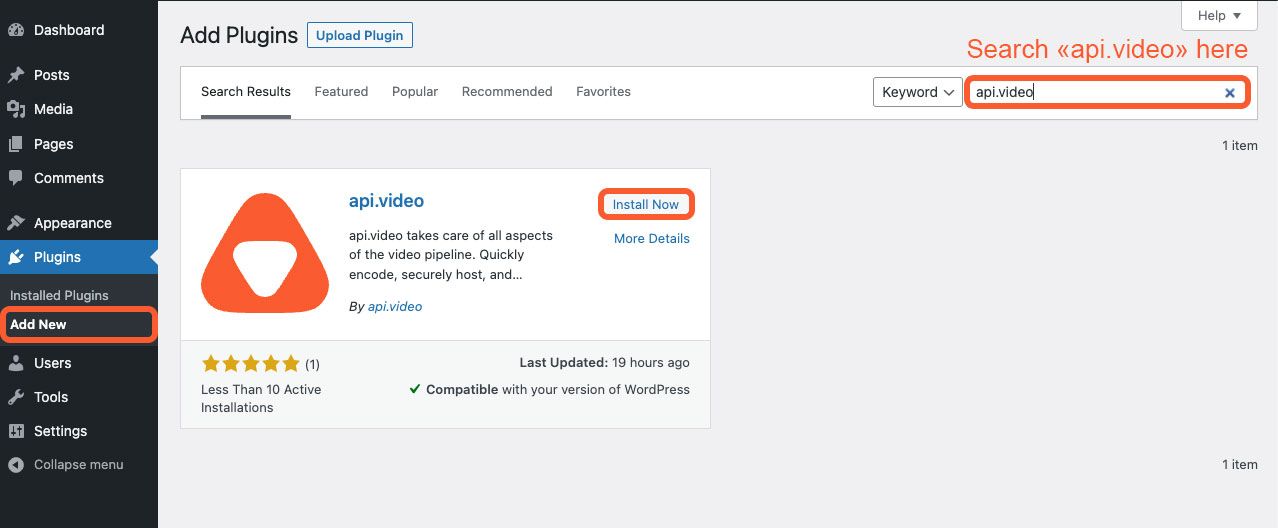
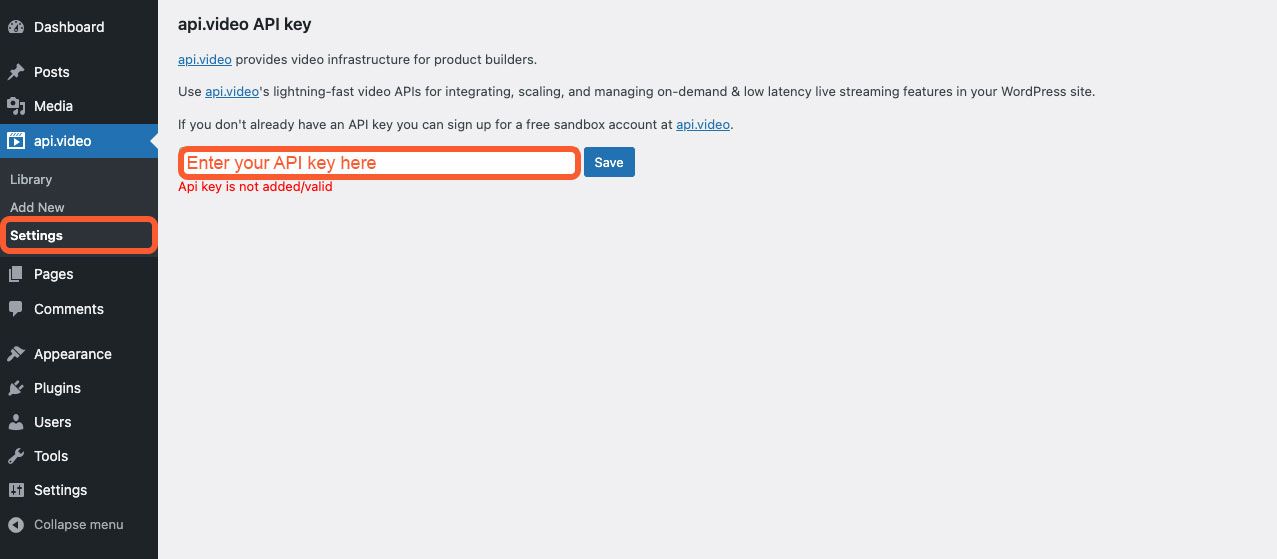
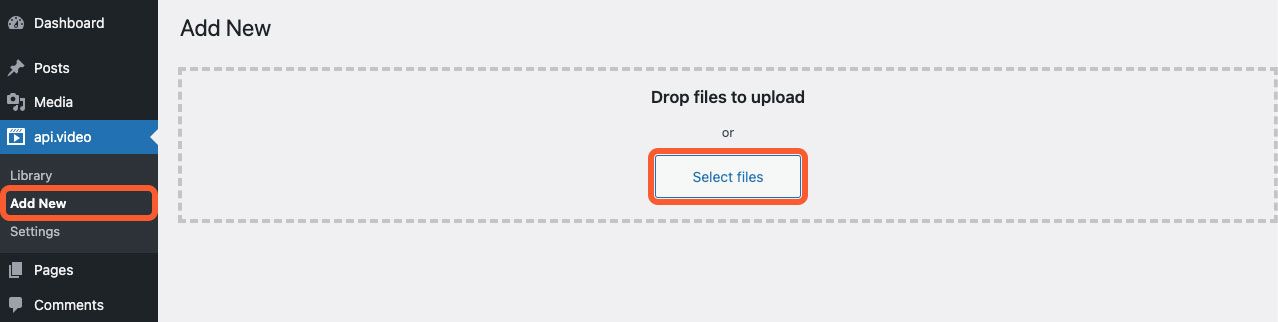
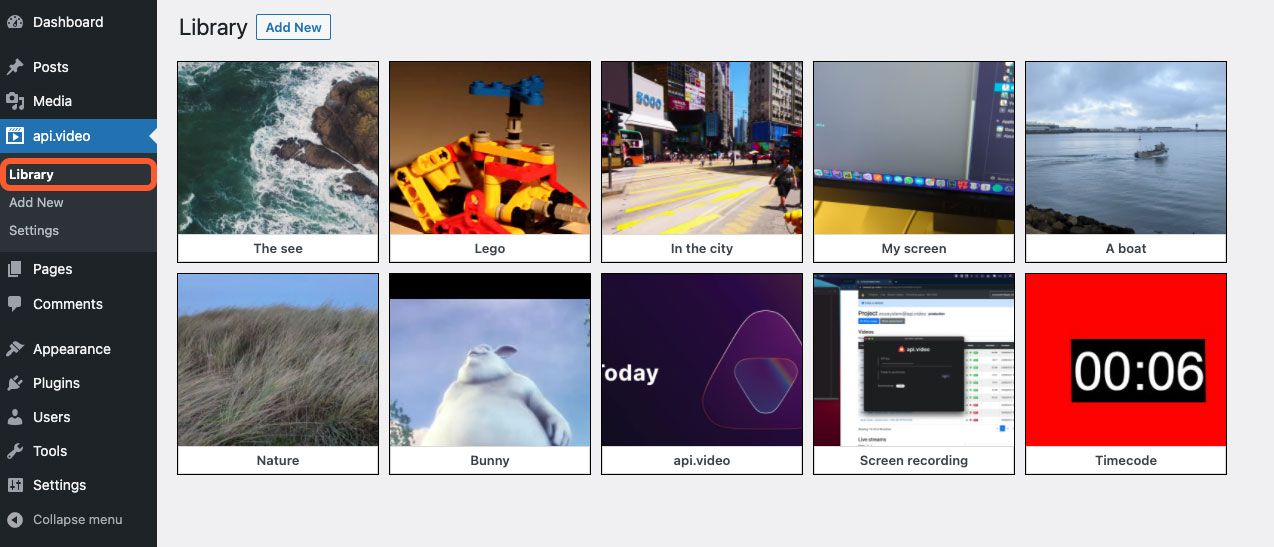
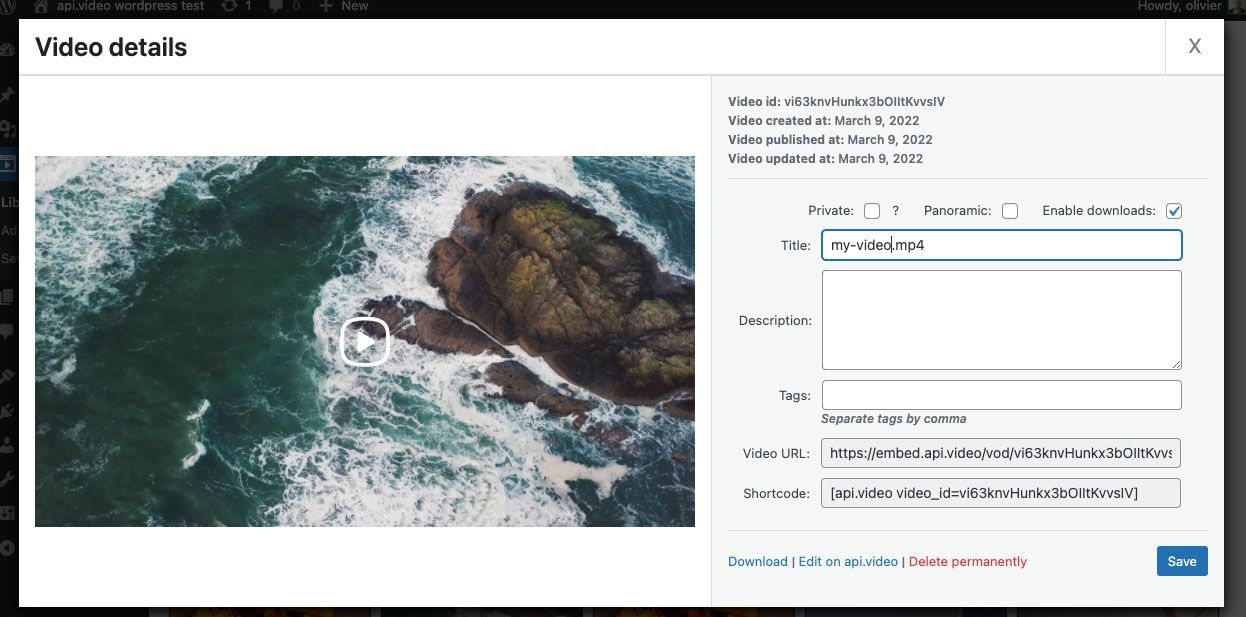
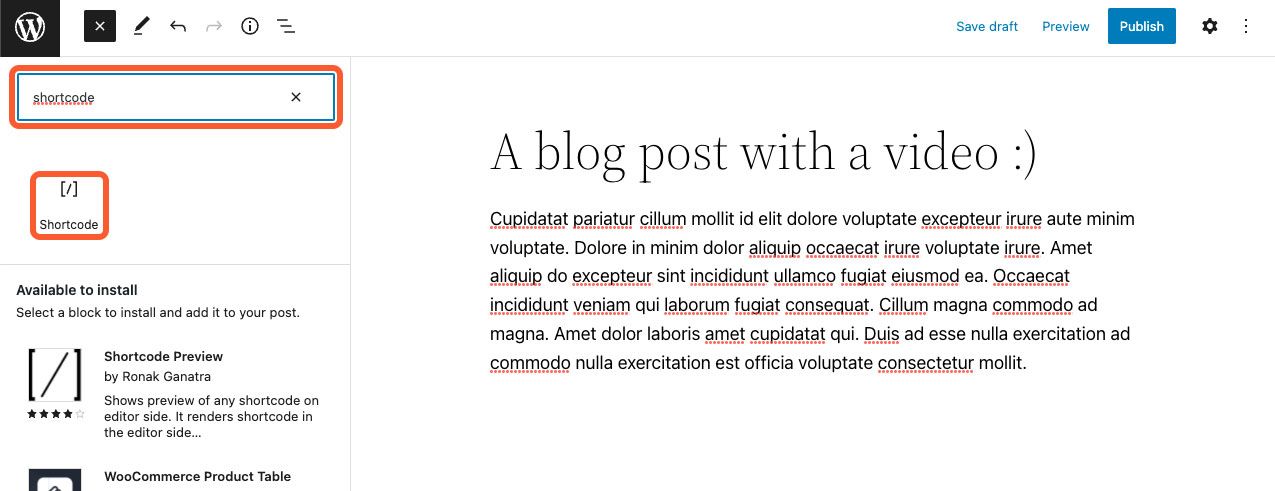
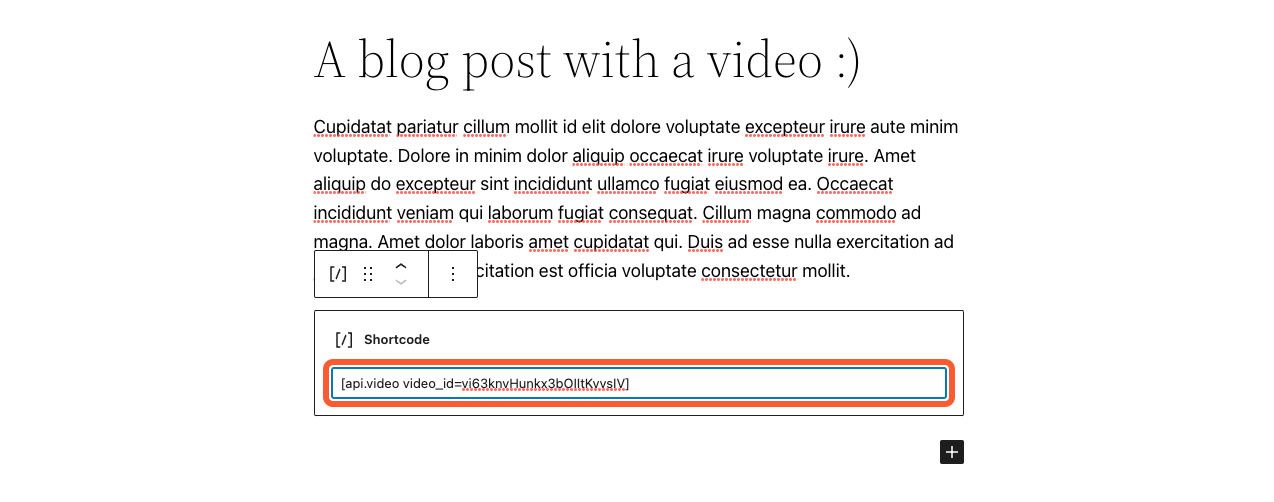
We've launched the new api.video WordPress plugin. In a few clicks, embed and manage all your videos from your WordPress admin.
Olivier Lando
March 16, 2022

LATEST ARTICLES

Product updates · 3 min read
An upgraded Analytics is here: Deeper insights, better tracking
Discover our biggest Analytics upgrade yet! Check out expanded metrics, new dimensions, and more.
Arushi Gupta · November 6, 2024
Product updates · 3 min read
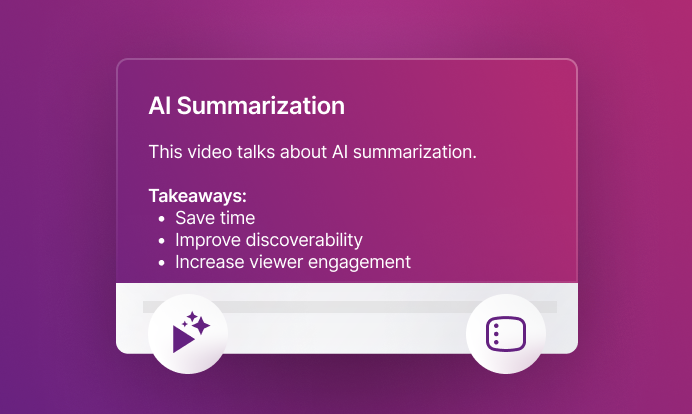
Introducing AI video summarization: Derive key moments from hours of content
Discover how our AI video summarization can instantly extract key moments from hours of content, saving you time and boosting productivity.
Cédric Montet · October 23, 2024

Product updates · 3 min read
The wait is over: AI video transcription officially launches today
Learn about our latest AI transcription feature, designed to make your videos more accessible, searchable, and engaging.
Cédric Montet · October 15, 2024
Try out more than 80 features for free
Access all the features for as long as you need.
No commitment or credit card required
Video API, simplified
Fully customizable API to manage everything video. From encoding to delivery, in minutes.
Video API, simplified
Fully customizable API to manage everything video. From encoding to delivery, in minutes.
Built for Speed
The fastest video encoding platform. Serve your users globally with 140+ points of presence.
Built for Speed
The fastest video encoding platform. Serve your users globally with 140+ points of presence.
Let end-users upload videos
Finally, an API that allows your end-users to upload videos and start live streams in a few clicks.
Let end-users upload videos
Finally, an API that allows your end-users to upload videos and start live streams in a few clicks.
Affordable
Volume discounts and usage-based pricing to ensure you don’t exceed your budget.
Affordable
Volume discounts and usage-based pricing to ensure you don’t exceed your budget.