Video trends · 5 min read

Video live streaming in just 5 easy steps
Sharing live video is an exciting way to connect with your audience. Get a live video stream up and running in just 5 steps.
Doug Sillars
February 11, 2020
sql

sql
sql


sql
LATEST ARTICLES

Video trends · 10 min read
Behind the scenes of video production at api.video — A tête-a-tête with our video editor
Go behind the scenes with our video editor at api.video! Discover the ins and outs of video production, from creative planning to final cut, and learn what it takes to bring great content to life.
Multiple authors · November 12, 2024

Video trends · 8 min read
Token-based authentication: The key to safer API interactions
Learn how token-based authentication in web APIs secures sensitive data and simplifies access control.
api.video · October 28, 2024
Video trends · 4 min read
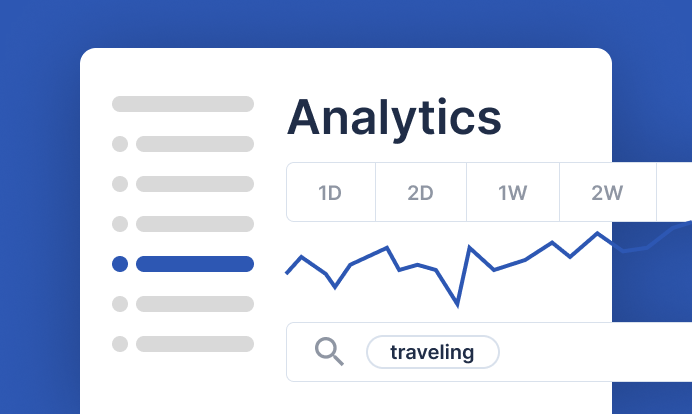
How we use Analytics at api.video to optimize our video content — and you can too!
Learn practical tips and techniques to optimize your own video content with Analytics as we share the approach we use in-house.
Multiple authors · October 18, 2024
Try out more than 80 features for free
Access all the features for as long as you need.
No commitment or credit card required
Video API, simplified
Fully customizable API to manage everything video. From encoding to delivery, in minutes.
Video API, simplified
Fully customizable API to manage everything video. From encoding to delivery, in minutes.
Built for Speed
The fastest video encoding platform. Serve your users globally with 140+ points of presence.
Built for Speed
The fastest video encoding platform. Serve your users globally with 140+ points of presence.
Let end-users upload videos
Finally, an API that allows your end-users to upload videos and start live streams in a few clicks.
Let end-users upload videos
Finally, an API that allows your end-users to upload videos and start live streams in a few clicks.
Affordable
Volume discounts and usage-based pricing to ensure you don’t exceed your budget.
Affordable
Volume discounts and usage-based pricing to ensure you don’t exceed your budget.