Tutorials · 6 min read
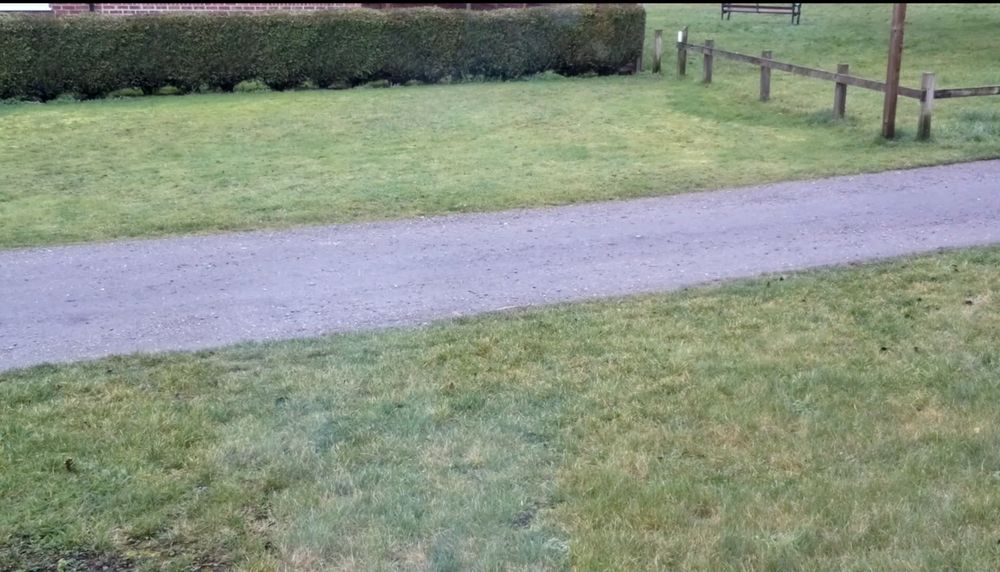
View out my window

Video streaming with a Raspberry Pi

At the birth of the internet, we had webcams that took a picture every x minutes. Now, anyone can set up a live stream of video - with just a camera and a network connection. This kicks off a series of posts experimenting with live streaming video. In this post, we'll use a Raspberry Pi.

Doug Sillars

December 29, 2020

Live streaming video is everywhere. Stores use them to catch shoplifters, cities use them in public areas to deter crime, and regular people have dashboard cameras, doorbell cameras, and more!

Maybe you have an idea on how to use streaming video, but you are not sure how to stream and store the video. Over the coming weeks, we'll show you how to use 'off the shelf' technology to create live streams that are broadcast on the internet.

Our first post uses a Raspberry Pi with the integrated PI camera to live stream video

Hardware

To create this post, I bought a Raspberry Pi 4 and the Pi Camera module. (I also bought a case for my Pi so that it all looks good). I installed the camera, and got my Pi up and running with NOOBS. I made sure that the camera worked by taking a short video with raspivid.

With all my hardware up and running, time to create the code.

Bash Script

This is not a fancy demo, so I created a BASH script to run the camera:

#!/bin/bash

raspivid -o - -t 3540000  -fps 25 -g 50 -b 4400000 | ffmpeg -re -i - -vcodec copy -g 50 -preset ultrafast -tune zerolatency -f flv rtmp://broadcast.api.video/s/{streamKey}

This one line script calls raspivid to create an output (-o) of length (-t) 3540 seconds. (I'll save you the math - that's 59 minutes.) The video is recorded at 25 frames per second, and has a bitrate of 4.4MBPS.

This is fed to FFMPEG, and it creates a RTMP flv output. Since I am streaming - I prefer fast encoding over high quality encoding - so the parameters -preset ultrafast and -tune zerolatency help ffmpeg know to prioritize speed over quality (but the stream still looks good). The stream is then sent to api.video (with my streamKey).

To create your api.video stream key, you must authenticate with your apiKey, and then use the create a live stream endpoint to create a live stream container. This is all explained in the Create a live stream tutorial.

When I run this script, the camera in my pi turns on and begins recording video - and streaming it to api.video. A few seconds later, the live stream link will show the content to anyone with the url!

With just one line of code in a shell script - we are live streaming with our Pi to the entire internet!

Automating the script

You may have noticed that I set the video to only record for 59 minutes. If I had set -t 0, the live stream would have continued until the process was stopped (power outage, the pi crashed, world cataclysm, etc.). But, in the next section, we'll automate this script to run every hour. I'll record 59 minutes, the stream will turn off for a minute, and then record the next hour.

I have configured my live stream to save every recording. With a new recording every hour, I now have 24 nicely indexed videos per day allowing for easy retrieval of video (if an event happens at 16:20 - I know which video will have that footage).

Of course (as anyone who has watched any bank heist movie ever knows), the video is out for 60 seconds every hour, so if you're up to no good, you'll have to be quick.

To automate the script, I run

crontab -e

and add this line:

40 * * * * <path to my script>

This will start the script at 40 past the hour, every hour. Of course you can choose any value 0 to 59 in this position.

Tidying up a bit

I am writing this post in late December 2020, during the shortest days of the year. After the Pi was up and running for a day, I went to look at my recordings (just to see that it was working).

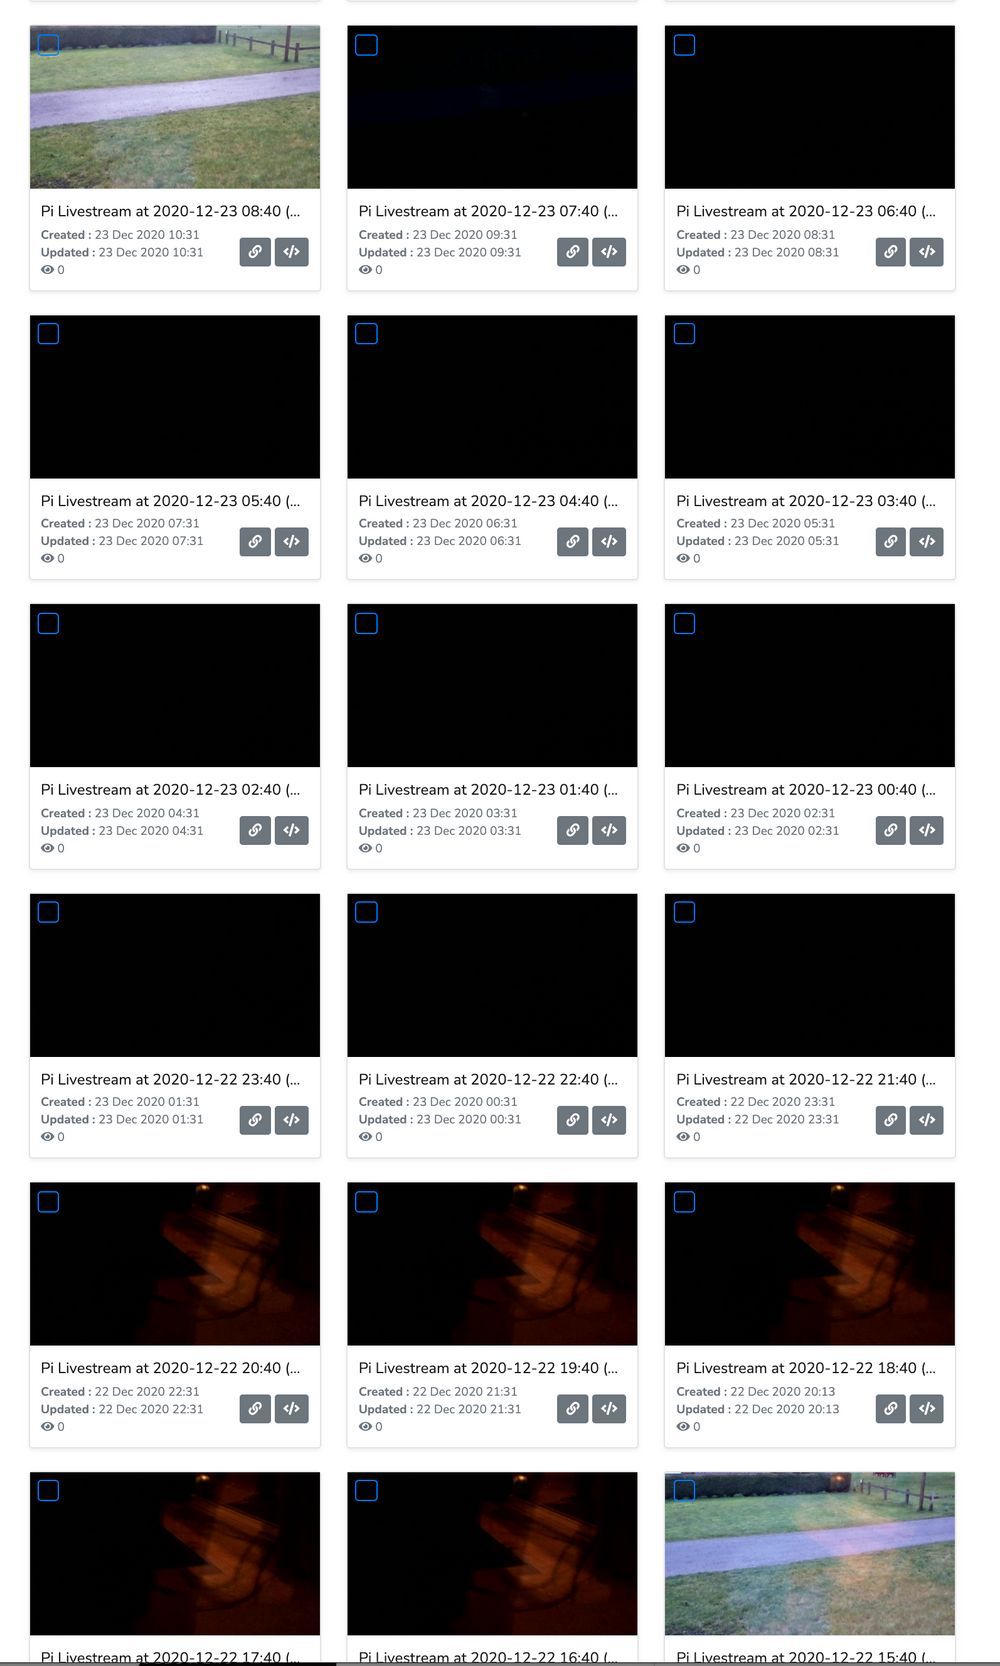
thumbnails of livestreams - overnight

If you look at the thumbnails above - the bottom right video began at 1540 - and it was still light out. By 1640, the thumbnail was dark (but you can see a reflection of the lights in the house). Between 2040 and 2140, the house lights go out, and we begin 11 one hour videos of blackness. The next video with light is at 0840 the next day. That's 16 videos of mostly blackness!

camera still at night

There's no need to record videos when it is dark outside - we cannot see a thing.

Setting a timer

Luckily, we can ping a server for sunrise and sunset times. Copying the code from a bash tutorial, I grab the hour of sunrise and sunset in my location (UKXX1270). If the current hour fits between the hours of sunrise and sunset, we'll record the video.

 # First obtain a location code from: https://weather.codes/search/
 #https://linuxconfig.org/how-to-obtain-sunrise-sunset-time-for-any-location-from-linux-command-line
	  # Insert your location. For example LOXX0001 is a location code for Bratislava, Slovakia 
	  location="UKXX1270" 
	  tmpfile=/tmp/$location.out 
 
	  # Obtain sunrise and sunset raw data from weather.com 
	  wget -q "https://weather.com/weather/today/l/$location" -O "$tmpfile" 
 
	  SUNR=$(grep SunriseSunset "$tmpfile" | grep -oE '((1[0-2]|0?[1-9]):([0-5][0-9]) ?([AaPp][Mm]))' | head -1) 
	  SUNS=$(grep SunriseSunset "$tmpfile" | grep -oE '((1[0-2]|0?[1-9]):([0-5][0-9]) ?([AaPp][Mm]))' | tail -1) 
 
 
	  sunrise=$(date --date="$SUNR" +%R) 
	  sunset=$(date --date="$SUNS" +%R) 
	  sunriseHour=$(echo $sunrise| cut -d':' -f 1) 
	  sunsetHour=$(echo $sunset| cut -d':' -f 1) 
	  currentHour=$(date +'%H') 


	  if [ $currentHour -ge $sunriseHour ] 
	  then 
	          if [ $currentHour -le $sunsetHour ] 
	          then 
	                  #sun is up stream 
	                  raspivid -o - -t 3540000  -fps 25 -g 50 -b 4400000 | ffmpeg -nostdin  -re -i - -vcodec copy -g 50 -preset ultrafast -tune zerolatency -f flv rtmp://broadcast.api.video/s/5e0d337b-2da8-41b7-b460-f2dda866e485 
	                  fi 
 
	  fi


This will prevent my pi from recording the 12-16 hours of black video that I recorded the first night (of course, in the summer, I'll have 16 videos, and 8 hours that there are no recordings).

Watching the video

If the video is broadcasting: you'll see the video here.

Conclusion

We've created a live stream camera with a Raspberry Pi with just a few lines of code. The video is live streamed to the world, and all videos are stored on api.video for later watching (if desired).

In the coming posts, we'll use the PI to do machine learning with videos. We will also investigate other 'off the shelf' cameras for video streaming with api.video.

Questions or comments? Head over to our community forum or get started building right away!

Try out more than 80 features for free

Access all the features for as long as you need.
No commitment or credit card required

Video API, simplified

Fully customizable API to manage everything video. From encoding to delivery, in minutes.

Built for Speed

The fastest video encoding platform. Serve your users globally with 140+ points of presence. 

Let end-users upload videos

Finally, an API that allows your end-users to upload videos and start live streams in a few clicks.

Affordable

Volume discounts and usage-based pricing to ensure you don’t exceed your budget.