No-code ยท 9 min read

api.video logo animation

Create an NFT with api.video, Ethereum, MintGate, and Metamask (without breaking the bank)

--

Erikka Innes

September 30, 2021

NFTs (non-fungible tokens) are super popular these days. You've no doubt heard that people sell NFTs for their art, be it music, painting, writing, drawings, videos and more. Some artists use NFTs to sell special tickets to their concerts and sometimes video games even sell in-game items using NFTs. But what, you might ask, are they selling that requires the NFT? Well, non-fungible means unique token, and the idea is that it's something that can't be copied. So an NFT is like a digital certificate that shows that you own a particular asset or piece of digital art.

So if it's not something that can be copied, how come there's copies of files sold as part of NFTs? The idea is that when you buy the NFT you get the original work, or you get one of a limited batch that are certified by using an NFT. If it's something widely available - like an internet meme, then the NFT is there to show ownership even if there are copies of that file available online elsewhere. Sometimes the NFT includes special rights, like only you can use the asset as part of an avatar. For example if you bought a digital drawing as an NFT, it might be that only you can set it as your profile picture, or something similar. Also, because the NFT is a unique token that is part of the blockchain for a cryptocurrency, its entire ownership history can be tracked.

A couple of common misconceptions about NFTs are that they are expensive, and that you need to use Ethereum to create them. In terms of price point, there are two popular ways of viewing NFTs. One is NFTs as expensive fine art but in the digital space. The very wealthy will collect these, they're often one-of-a-kind and that's that. The other way is the NFT as a trading card. There might be multiple copies of it in a batch, similar to a trading card, but the number of "cards" is limited. This type of NFT is often more affordable. As for requiring Ethereum to create an NFT, this is just one of the most popular cryptocurrencies to make them with. You can add NFTs to many kinds of cryptocurrency other than Ethereum.

There are several cool things about NFTs - you can buy them to support an artist or a project or cause you care about. You can buy them and join groups where being part of the group requires that you own a particular type of NFT. And, when an NFT is sold, they can be set up so that the original artist always receives royalties on them for every sale. This can help put artists on the map or earn them much needed income they require to continue making art.

There are a few different ways NFTs are set up. Sometimes NFTs can be set up somewhere like opensea.io where they house the asset for you and act as a digital marketplace where people can browse what you're selling. Embedding digital assets directly into each NFT can get cumbersome. So what's common, is the NFT contains details about where you can go to see the digital art or download it if it is yours. The art is then kept somewhere else. In the case of video, you could store your NFT content with a service like us here at api.video. If privacy is a key component of the art being sold, there are different ways you can gate the content.

If it sounds a little complicated, maybe it will be clearer after we create our own video NFT! Today, we'll learn how to make an NFT with RenderForest, Ethereum, MetaMask, and Mintgate.

Ready to build your own NFT? Let's get started!

Create something worthy of becoming an NFT

The first step is creating the asset you want to use for an NFT. Just for fun, I went ahead and created a short video of api.video's logo appearing out of a giant green fireball! To achieve this magic, I used renderforest.com. They offer a wide variety of incredible ways to animate your company logo or other image. Possibly this isn't going to be the biggest selling NFT, but it works great for our tutorial today.

Here is our sample video for our NFT!

Let's set up our cryptocurrency wallet and buy some Ethereum!

The next big task is setting up a cryptocurrency wallet to buy Ethereum with. MetaMask is a popular cryptocurrency wallet to use, because it's easy to connect with NFT marketplaces, where you're going to want to put your NFT up for sale and to be seen. Here's the steps:

  1. Navigate to https://metamask.io.
  2. Click Download on the front page. You're taken to a page that allows you various downloading choices like Chrome, iOS and Android.
  3. Choose the download option that works best for you. If you're following along exactly, then click the Chrome button at the top of the page. You'll see a corresponding download button after you select your environment. For Chrome, it will say Install MetaMask for Chrome.
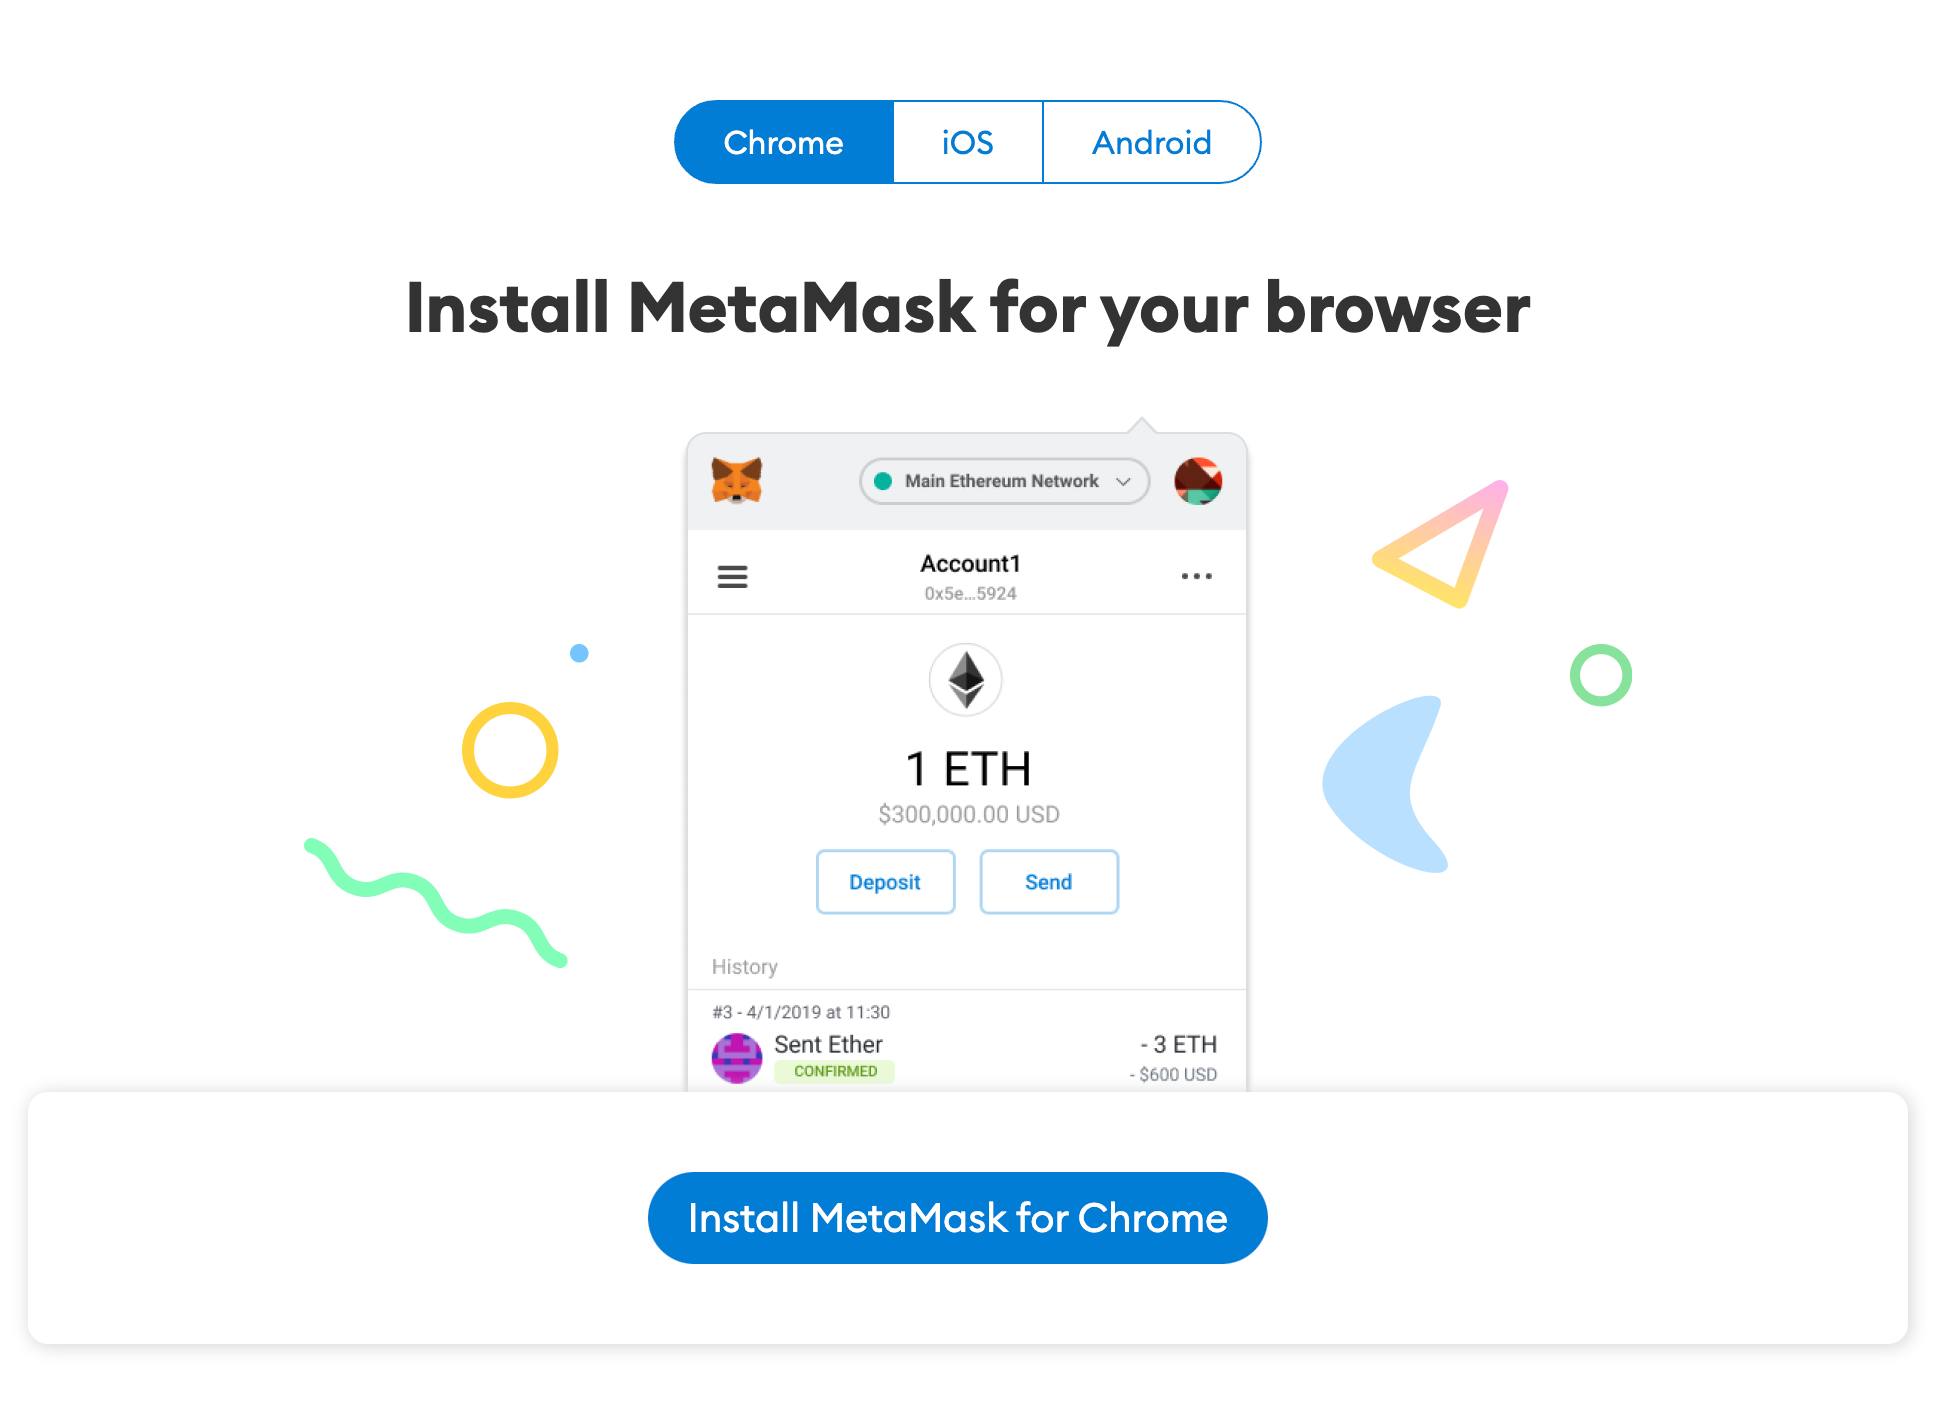
Install MetaMask for your Browser
  1. Click Install MetaMask for Chrome. This will quickly set up MetaMask as a Chrome extension. You'll have to walk through signing up, creating a wallet and getting your secret pass phrase for security. Just follow the steps provided by the wizard, beginning with choosing Create a wallet.
Create a MetaMask Wallet
  1. When you're done, MetaMask is installed. You'll be asked if you want to buy cryptocurrency. To do this you have to use another service, like Wyre. Follow the provided instructions to go to Wyre, sign up, and buy cryptocurrency for your account.
  2. Now you have a wallet with cryptocurrency. If you want to look in your wallet, you can click the icon to the left of your profile icon in the upper right corner of the Chrome browser. You'll be able to choose MetaMask from a list of extensions. It will then show the icon at the top of the browser. You can hover over it to see the contents of your wallet.

Let's add our NFT to an NFT marketplace

There are many choices for where to create an NFT. Typically you connect your wallet to what's called an NFT marketplace. NFT marketplaces let you create and sell NFTs as well as buy them. You can build collections to display to others for show and to offer for sale. A lot of marketplaces will also house the digital assets you're buying and selling. This can get more complicated with larger assets, or in cases where you want to keep assets private rather than open to viewings by the public. That's why we're going to use MintGate. MintGate is an NFT marketplace that allows you to securely gate your NFT content so that it's only viewable by people who have access to a viewing token. Here are the instructions:

  1. If you haven't already, sign up for an api.video account so we can upload your video NFT to your api.video account. This is a no-code tutorial, so we'll use the GUI.
  2. Sign in to api.video, and drag your video over the giant Upload button. Check that you have it uploaded correctly by clicking My videos. You should see that it's been added.
  3. Click on your new video, and then click the Edit video button.
  4. Uncheck the box for mp4 support. This makes it so the video can't be downloaded from a player.
  5. Navigate to https://mintgate.io. The front page describes what their marketplace does - it allows you to token gate content and generate secret links for events, videos, music, websites, blogs and whatever else you might want to link to.
  6. Click the blue Create button.
  7. Click Content NFT.
  8. For What NFT do you wanna create? click Gated Link.
  9. Go up to the right corner of the browser and open the MetaMask extension and make sure your wallet shows as connected. If not, follow the instructions for connecting it.
  10. In the Add Content field, put a link to your video you uploaded to api.video. You can get this link by navigating to your video through the dashboard and then clicking the video. Click Copy link to grab just the link and then add it to the field.
  11. For Set a Title name your link.
  12. Add a description in the Add a Description field.
  13. For Add a Cover, choose an image to display for your NFT.
  14. In the Number of NFTs field, enter 10.
  15. In the Set Price in ETH field, enter the price you want to charge. This is where you can make the NFT you're creating very expensive or very cheap. Today I'm choosing to set the price at .001 which will come out to about $3.3.
  16. Next, Choose your royalties. This is how much you'll receive when your NFT is resold by a buyer later. I'm choosing 10%.
  17. Click Create NFT! You'll get a note saying Please Wait for Wallet Prompts... Click Sign on Both Prompts to Create NFT.
  18. The place where you need to sign doesn't open automatically - go to your MetaMask extension to see the request. Scroll down and click Sign. You'll have to do it a few times.
  19. Congrats! Your NFT is now available for sale. You can add additional content to it if you want, or leave it as-is. MintGate uses something called lazy minting, so your NFT will not be fully minted until you have a buyer.

Conclusion

MintGate offers a wide variety of options for what you can create and gate. If you had fun creating this NFT, you might want to try out some of the other features and options they offer to create different kinds of NFTs.

If you have any questions about this post, or would like to continue the coversation, please join our community forum.

Try out more than 80 features for free

Access all the features for as long as you need.
No commitment or credit card required

Video API, simplified

Fully customizable API to manage everything video. From encoding to delivery, in minutes.

Built for Speed

The fastest video encoding platform. Serve your users globally with 140+ points of presence.ย 

Let end-users upload videos

Finally, an API that allows your end-users to upload videos and start live streams in a few clicks.

Affordable

Volume discounts and usage-based pricing to ensure you donโ€™t exceed your budget.